
All About Car Paint Primer Sealer
Why Car Paint Primer Sealer Matters Before Colour

A well-chosen car paint primer sealer creates a consistent, protected surface for colour coats, helping the topcoat lay down evenly and reducing the risk of old repairs, filler edges or porous primer showing through. The positive result is a uniform finish with reliable adhesion. The negative result of skipping or misusing a sealer can be uneven colour, solvent reaction or visible patchiness. Apply a compatible automotive sealer over properly prepared primer or existing finish, then topcoat within the product's specified wet-on-wet window.
Key Takeaways
- Use a sandable primer to fill and level repairs, then sand it smooth.
- Use a primer sealer when the surface needs a uniform barrier before colour.
- Choose a two-pack (2K) sealer where the coating system calls for greater solvent resistance and durability.
- Check product compatibility, mix ratios, flash times and topcoat windows before spraying.
- Explore our Primer collection to match the sealer to your repair and paint system.
At Eastern Auto Paints, we help trade painters, restoration workshops and serious DIY vehicle owners select coatings as a complete system, rather than treating primer, sealer and colour as separate decisions. Our approach starts with the substrate: bare steel, aluminium, repaired panels, existing paintwork or high-build primer all need the right preparation and compatible coating layer.
A primer sealer is not automatically required on every job, but it is often the layer that brings a mixed surface back to one predictable foundation before colour. We focus on practical product guidance, correct preparation and technical consistency so your refinishing work has the best possible base for a durable, professional-looking finish.
Fundamentals of Car Paint Primer Sealer in Auto Refinishing
In vehicle refinishing, achieving an unblemished final clearcoat begins long before colour atomisation. A car paint primer sealer functions as an intermediate barrier coat specifically engineered to isolate underlying substrates from aggressive solvents found in modern basecoats. When repairing automotive bodywork, surfaces often present a patchwork of sanded OEM finishes, cured polyester body fillers, and bare metal rub-throughs. Without a dedicated sealing layer, these distinct materials absorb solvents and pigments unevenly, creating visible gloss mapping and edge-mapping defects.
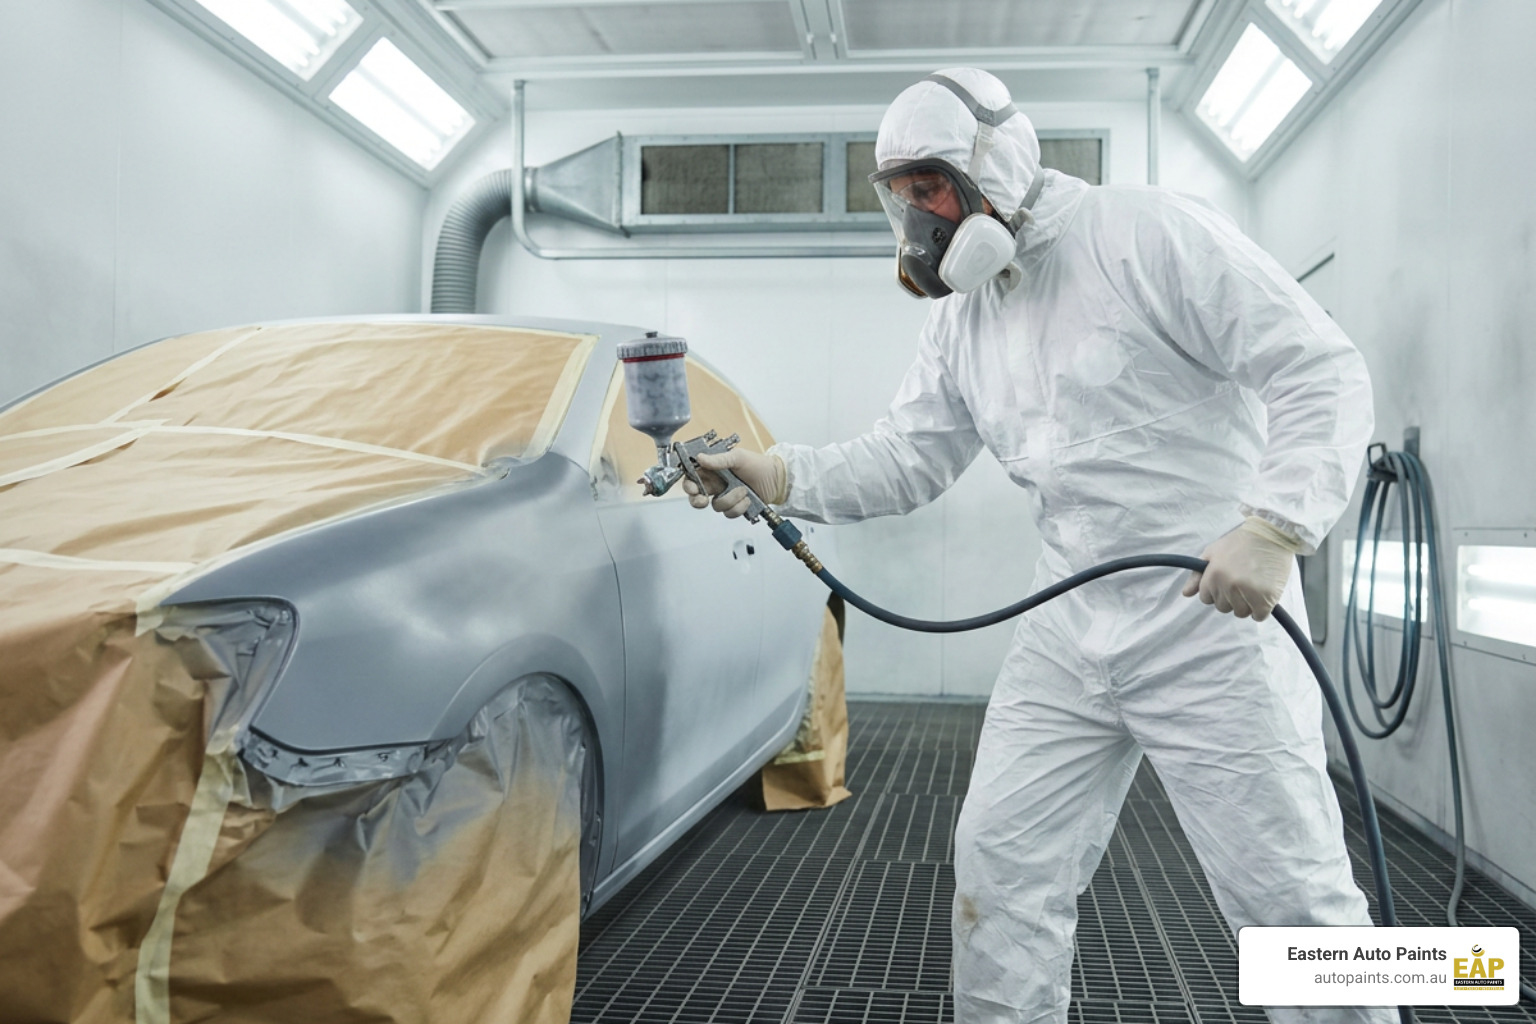
The application of a sealer creates uniform colour holdout and establishes an ideal surface tension for topcoat wet-out. By delivering a non-porous, smooth foundation, sealers prevent topcoat resin sinkage, ensuring maximum gloss and depth of image in the final clearcoat. Application parameters, film build characteristics, and flash windows vary significantly depending on product chemistry. Always check the manufacturer's technical data sheet (TDS) or product label for exact spray gun settings, reduction requirements, and recoat windows. Appropriate personal protective equipment (PPE) must always be used; refer to SafeWork Australia or WorkSafe Victoria guidance alongside the relevant safety data sheet (SDS) for your specific respiratory and skin protection requirements.
Sandable Primer vs Car Paint Primer Sealer
Understanding the functional boundary between a high-build sandable primer and a dedicated primer sealer is essential for efficient panel preparation. Each formulation serves a distinct technical purpose within the paint stack.
- High-Build Sandable Primer: Formulated with heavy pigment loading and high solids content, sandable primers provide the mechanical film build necessary to block out sand scratches, minor surface imperfections, and filler transitions. Products such as Dulon Premium Primer Filler are engineered specifically for dry or wet sanding, acting as a levelling surfacer.
- Dedicated Primer Sealer: Formulated with specialised resins to form a tight, continuous barrier, primer sealers are applied thin and flat, typically as a non-sanding, wet-on-wet groundcoat immediately prior to colour application. To explore these options across different project requirements, refer to our guide on Choosing Your Canvas: Understanding Automotive Paint Primer Types.
When choosing between these two options, base your decision on current surface condition:
- Use a sandable primer when the substrate requires physical block sanding to remove file marks, feather out repair margins, or achieve panel straightness.
- Use a primer sealer when bodywork is completely straight and properly sanded, but requires uniform colour shade, solvent isolation over mixed repairs, or optimal chemical adhesion for topcoating.
Automotive Primer Formulations: 1K vs 2K Car Paint Primer Sealer
The distinction between single-pack (1K) and two-pack (2K) formulations represents fundamental differences in chemical resistance, curing kinetics, and long-term durability.
1K (Single-Pack) Formulations
Single-pack products dry purely via physical solvent evaporation. These sealers offer convenience for minor spot repairs or quick rub-through isolation, requiring no mixing with chemical activators. For convenient delivery, painters often utilise aerosol primer options for rapid shop tasks. However, because they do not form a crosslinked chemical network, 1K films remain susceptible to resolvation if flooded with aggressive 2K thinners.
2K (Two-Pack) Formulations
Two-pack systems rely on a chemical reaction between resin bases and polyisocyanate or polyamide hardeners. A premium system like the Unicolour HS Pro 2K 5L Primer Kit creates a fully thermoset, crosslinked polymer network that provides superior solvent holdout, chip resistance, and structural density. For specialised corrosion barrier work, our The Guide to Epoxy Primer Paint for Cars details the crosslinking behaviour of epoxy systems. For localised 2K repairs without mixing spray guns, products like Mipa 2K Epoxy Primer Filler Aerosol 400ml utilise integrated internal hardener chambers.
Decision Guide: 1K vs 2K
- Select a 1K system when performing rapid spot priming on minor rub-through areas where fast air-drying and low film build are needed.
- Select a 2K system for full panel repairs, complete vehicle refinishing, high-value restorations, or applications subject to harsh environmental exposure.
Application Order and Substrate Preparation on Bare Metal
Applying a multi-layer paint system over bare steel or aluminium requires careful sequencing to ensure corrosion protection, substrate adhesion, mechanical levelling, and colour holdout. Skipping essential steps or applying layers out of order can compromise paint adhesion or cause corrosion beneath the paint film. Detailed guidance on preparing clean metal panels is available in our Bare Metal Primer Guide 2026.
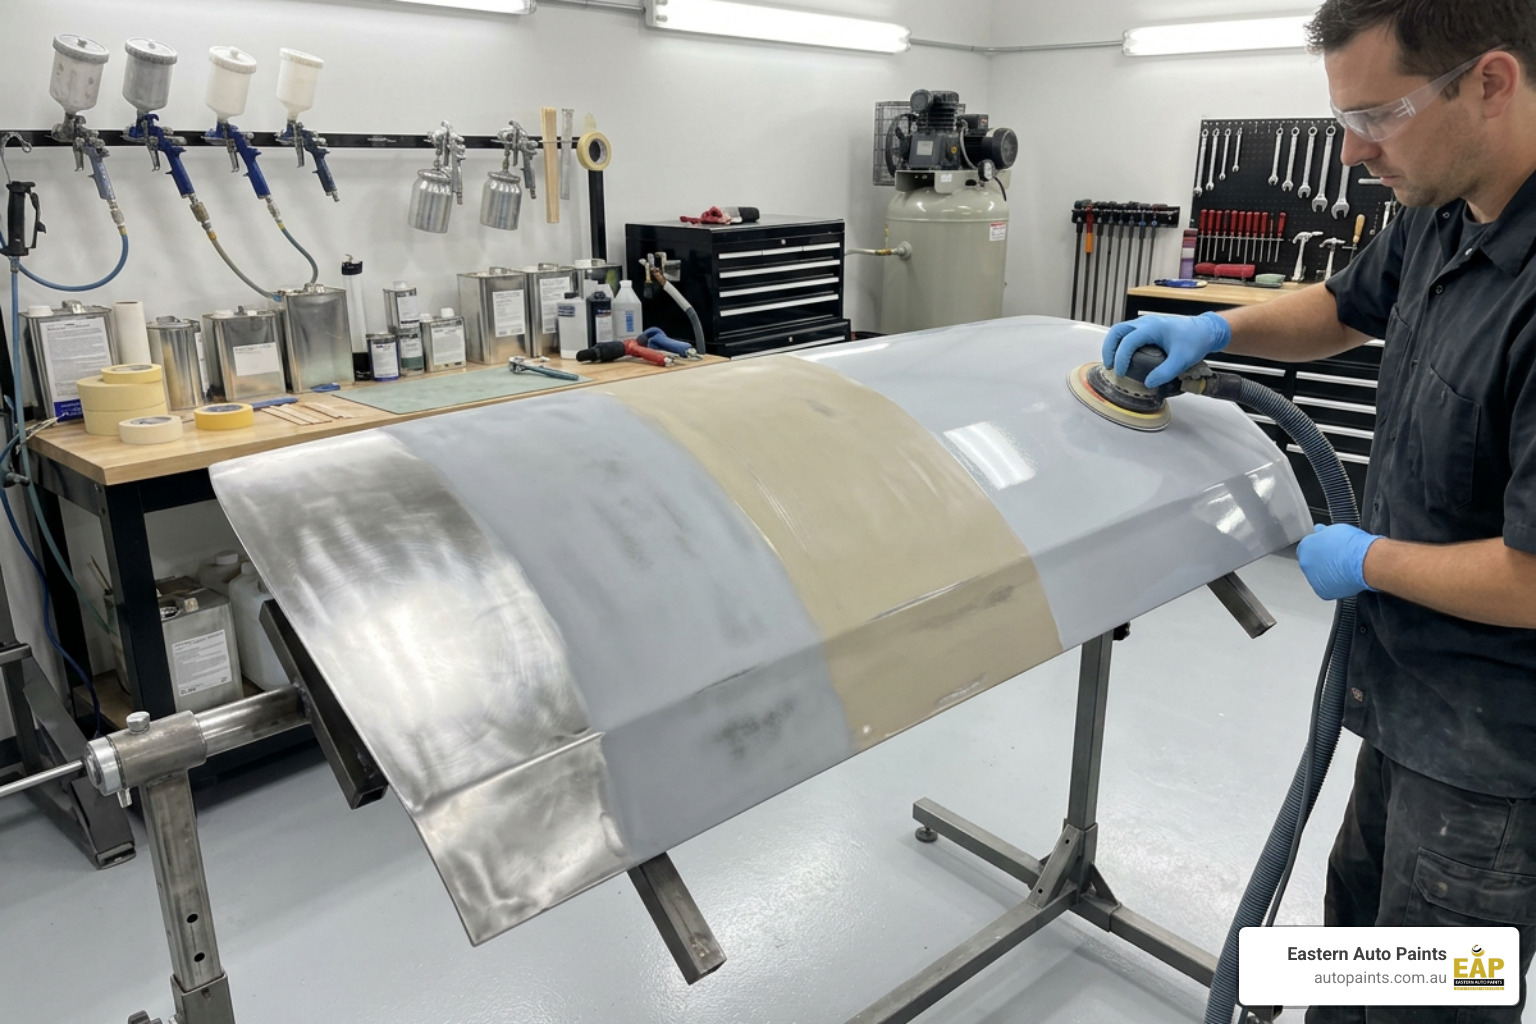
The table below outlines the core properties and functions of the three major primer classes used in automotive panel preparation:
| Primer Type | Primary Role | Adhesion Mechanism | Sanding Requirement | Typical Placement in Stack |
|---|---|---|---|---|
| Etch Primer | Chemical passivation & bare metal bite | Acid reaction with metal substrate | Non-sanding / Minimal | Direct to bare steel or aluminium |
| High-Build Surfacer | Mechanical filling & panel levelling | Mechanical key to prepared undercoat | Mandatory guide-coat block sanding | Over etch or direct-to-metal epoxy |
| Epoxy Primer Sealer | Moisture barrier & solvent isolation | Chemical crosslinking & high adhesion | Wet-on-wet (or light scuff if aged) | Over sanded surfacer or bare metal |
Layering Etch Primer, Primer Surfacer, and Sealers
When working with bare metal repairs that require substantial levelling, the standard trade process follows a precise layer build:
- Substrate Pre-treatment: Apply an acid-curing wash primer such as Concept 103 Etch Primer to chemically passivate bare steel or aluminium substrates.
- Levelling Surfacer: Once the etch coat has flashed per instructions, spray an intermediate build layer such as Protec 2K Paraglaze Multiprime to provide the thickness required for block levelling.
- Guide Coating and Block Sanding: Block sand the surfacer using progressive abrasive grits to achieve a flat surface free from texture.
- Final Barrier Sealer: Apply a non-sanding sealer layer, such as Car Rep 2K Epoxy Primer Aerosol Black, to seal sand scratches, isolate filler feather edges, and create uniform basecoat absorption.
Direct-to-Metal Capabilities and Substrate Sealing
Direct-to-metal (DTM) epoxy primer sealers combine chemical passivation, barrier protection, and topcoat adhesion into a single coating system. Formulations like ZP 113 Etch Primer provide fast metal bite, while robust DTM epoxies like Epotec Primer Surfacer seal out atmospheric moisture entirely. For a comprehensive comparison between these chemistries, explore our analysis on Epoxy vs Urethane Primer.
- DTM Epoxy Primer Sealer: Ideal for bare-metal restoration projects where panels will be exposed to ambient workshop humidity over extended periods. It offers a dense, non-porous structure that resists moisture penetration.
- Etch-plus-Urethane System: Ideal for high-throughput collision repair environments where fast cure times and rapid block sanding turnaround are primary considerations.
Matching Sealers with Topcoats and Preventing Solvent Attack
One of the most critical roles of an automotive primer sealer is preventing solvent strike-through and soft-edge mapping. When applying modern, high-solvent basecoats over sensitive substrates, such as aged thermoplastic acrylic (TPA), open body filler edges, or fresh feather edges, the aggressive reducers in the basecoat can swell the underlying layers. A properly cured 2K sealer acts as an impenetrable chemical barrier, preventing solvent penetration and eliminating wrinkling, lifting, and texture mapping.
Selecting high-grade surfacers like Protec 2K Paraglaze Prime Fill or Concept HS 2K High Build Primer 5L Kit ensures maximum substrate stability before sealing.
Sealer Selection for Basecoat/Clearcoat, Urethane, and Acrylic Systems
Matching the sealer colour (groundcoat shade) to the topcoat colour is standard trade practice for achieving a true colour match with minimal topcoat film build. Most paint systems categorise sealers into grey shades (White, Light Grey, Mid Grey, Dark Grey, Black).
- For light silvers, yellows, and vibrant reds: Apply a light grey or white groundcoat sealer using Concept HS Pro Primer Grey to promote pigment brightness and achieve rapid coverage.
- For dark blues, greens, and deep blacks: Apply a dark grey or black sealer groundcoat to maintain correct tonal depth without requiring excessive basecoat coats.
- For traditional acrylic lacquers: If spraying single-pack acrylic systems, ensure chemical compatibility with chosen reducers and groundcoats.
Automotive Formulations vs Standard Industrial Sealers
Automotive primer sealers are engineered specifically to accommodate the structural dynamics of motor vehicles. In contrast to standard architectural or general industrial sealers, automotive formulations feature:
- Thermal Expansion Stability: Formulated to withstand cyclical metal expansion and contraction across extreme ambient temperatures without micro-cracking.
- Flexible Resin Matrix: Designed to flex over plastic bumper bars and composite panels without delamination.
- Controlled Refinish Flash Windows: Engineered for fast chemical crosslinking, allowing wet-on-wet topcoating within precise workshop production schedules.
- Ultra-Fine Pigment Dispersion: Ground to exceptionally fine tolerances to prevent telegraphing grain texture through thin basecoat layers.
Common Primer Sealer Application Mistakes and Trade Solutions
Even experienced painters can encounter coating defects if process controls are overlooked during the sealing phase.
- Ignoring Wet-on-Wet Windows: Applying topcoat too quickly before the sealer has flashed can trap solvents, causing solvent popping, pinholing, or loss of gloss. Conversely, waiting past the maximum open window requires the sealer to be scuffed mechanically before topcoating. Check product TDS for specific flash and recoat timeframes.
- Dry Spray and Heavy Orange Peel: Inadequate fluid delivery or excessive spray distance causes dry, textured atomisation. This texture will telegraph directly into the clearcoat. Ensure spray gun fluid tip, fan pattern, and air pressure match the manufacturer's recommendations.
- Improper Substrate Cleaning: Failing to degrease bare metal or sanded primers before sealing traps silicone, grease, and sanding dust. For bare metal work, apply Concept Paints 110 Metal Etch Primer only after panel wash degreasing.
- Spraying Over Active Corrosion: Applying standard sealers over unneutralised surface rust will lead to bubbling and substrate failure. For isolated corrosion repair, apply Car Rep Anti Rust Primer Aerosol after mechanical rust removal.
Why This Issue Should Not Be Ignored
Overlooking the primer sealing stage can compromise the integrity of an automotive paint job. Modern basecoats and clearcoats rely on a stable, chemically uniform foundation to develop their rated gloss, durability, and adhesion. When a mixed repair substrate is topcoated without an appropriate barrier sealer, the paint film is subject to uneven absorption rates, leading to visible haloing around body repairs, patchy colour registration, and premature clearcoat peeling. Addressing surface uniformity before spraying colour protects the investment of time and materials put into panel preparation.
Common Symptoms, Challenges, or Questions
Trade painters and vehicle restorers regularly encounter specific paint shop challenges that point directly to primer sealer application:
- Substrate Mapping and Halos: Dark rings or dull edges appearing around repaired areas after clearcoat application indicate that solvent from the topcoat penetrated unsealed feather edges.
- Poor Colour Coverage: Basecoats requiring excessive coats to cover repair patches typically point to mismatched groundcoat undercoats beneath the colour.
- Solvent Boil and Dieback: Clearcoat losing its lustre or developing tiny micro-bubbles during baking often occurs when an intermediate primer layer has not been sealed, trapping volatile solvents.
- Adhesion Delamination: Topcoats flaking away from plastic bumpers or bare metal rub-throughs highlight an absence of dedicated direct-to-metal or adhesion-promoting sealers.
What a Personalised Experience Actually Looks Like
At Eastern Auto Paints, personalised service means pairing your specific job parameters with a fully compatible coating system. When you consult our technical team, we evaluate:
- The exact composition of your substrate (such as bare steel, galvanised panels, aluminium, or existing OEM finishes).
- The intended topcoat chemistry, whether 2K polyurethane, basecoat/clearcoat, or industrial enamel.
- Your workshop environment, including ambient temperature, airflow conditions, and available curing equipment.
By analysing these factors, we match you with the precise primer, hardener, and reducer combination to deliver reliable shop throughput and a lasting finish.
The Value of Consistency and an Ongoing Relationship
Achieving predictable refinish results relies on product consistency and technical support. Developing an ongoing relationship with an experienced automotive paint supplier ensures your workshop uses products designed to integrate seamlessly from bare metal to final clear. Consistent formulations reduce unexpected solvent reactions, minimise product waste, and eliminate costly rework, keeping collision repairs and custom builds moving forward smoothly.
What to Expect at Eastern Auto Paints
Customers partnering with Eastern Auto Paints gain access to comprehensive refinish support and professional-grade supplies:
- Advanced colour-matching technology for precise groundcoat and topcoat formulation.
- A wide selection of 1K and 2K primers, epoxies, surfacers, and dedicated non-sanding sealers.
- Premium spray equipment, workshop consumables, and safety gear.
- Practical technical advice from industry specialists across our Melbourne locations in Bayswater and Dandenong South.
When to Get in Touch or Take Action
If you are planning an automotive restoration, managing high-volume collision repairs, or experiencing substrate mapping issues on current projects, our technical specialists are ready to help. Reach out through our Contact Us page for expert advice on selecting the ideal primer sealer system for your workshop requirements.
Frequently Asked Questions About Car Paint Primer Sealers
What is the difference between a sandable primer and a primer sealer?
A sandable primer contains high solid pigments formulated to fill minor scratches, pinholes, and repair feather edges, requiring mechanical block sanding to achieve a flat surface. A primer sealer is formulated with specialised resins to create a non-porous barrier coat that prevents solvent penetration, evens out groundcoat colour, and allows topcoats to be sprayed wet-on-wet without sanding.
Can a primer sealer be applied directly to bare metal?
Certain direct-to-metal (DTM) primer sealers, particularly specialised 2K epoxy formulations, are designed to adhere directly to properly cleaned and abraded bare steel and aluminium. However, standard urethane or acrylic sealers generally require an underlying etch primer or direct-to-metal primer to ensure long-term corrosion resistance and substrate adhesion.
How does a primer sealer prevent solvent attack and lifting?
A cured two-pack (2K) primer sealer forms a dense, crosslinked polymer barrier that prevents the active solvents in new basecoats from penetrating underlying body fillers, sensitive featheredges, or aged paint layers. This isolation stops swelling, edge lifting, and gloss dieback from occurring in the topcoat.
How do I choose the right groundcoat colour for my primer sealer?
Sealer groundcoat colours should be chosen to complement the final basecoat shade to maximise hiding power and ensure accurate colour matching. Light grey or white sealers are suitable for bright silvers, yellows, and reds, while dark grey or black sealers provide the proper groundcoat foundation for dark blues, deep greys, and blacks.
Do I need to sand a primer sealer before applying basecoat?
Dedicated primer sealers are designed to be topcoated wet-on-wet within a specific open time window without sanding, allowing the colour coat to form a chemical bond with the sealer. If the sealer cures past the manufacturer's maximum recoat window, it must be scuffed lightly to create a mechanical key before spraying colour.