

Don't Get Bogged Down: Your Complete Guide to Body Filler Sanding
Why Body Filler Sanding is Critical to an Invisible Repair
Body filler sanding is the process of progressively smoothing cured polyester body filler to create a perfectly level, paintable surface that blends seamlessly with the surrounding panel. The technique determines whether your repair becomes invisible or remains a visible patch job that haunts you every time you look at your car.
Quick Guide to Body Filler Sanding:
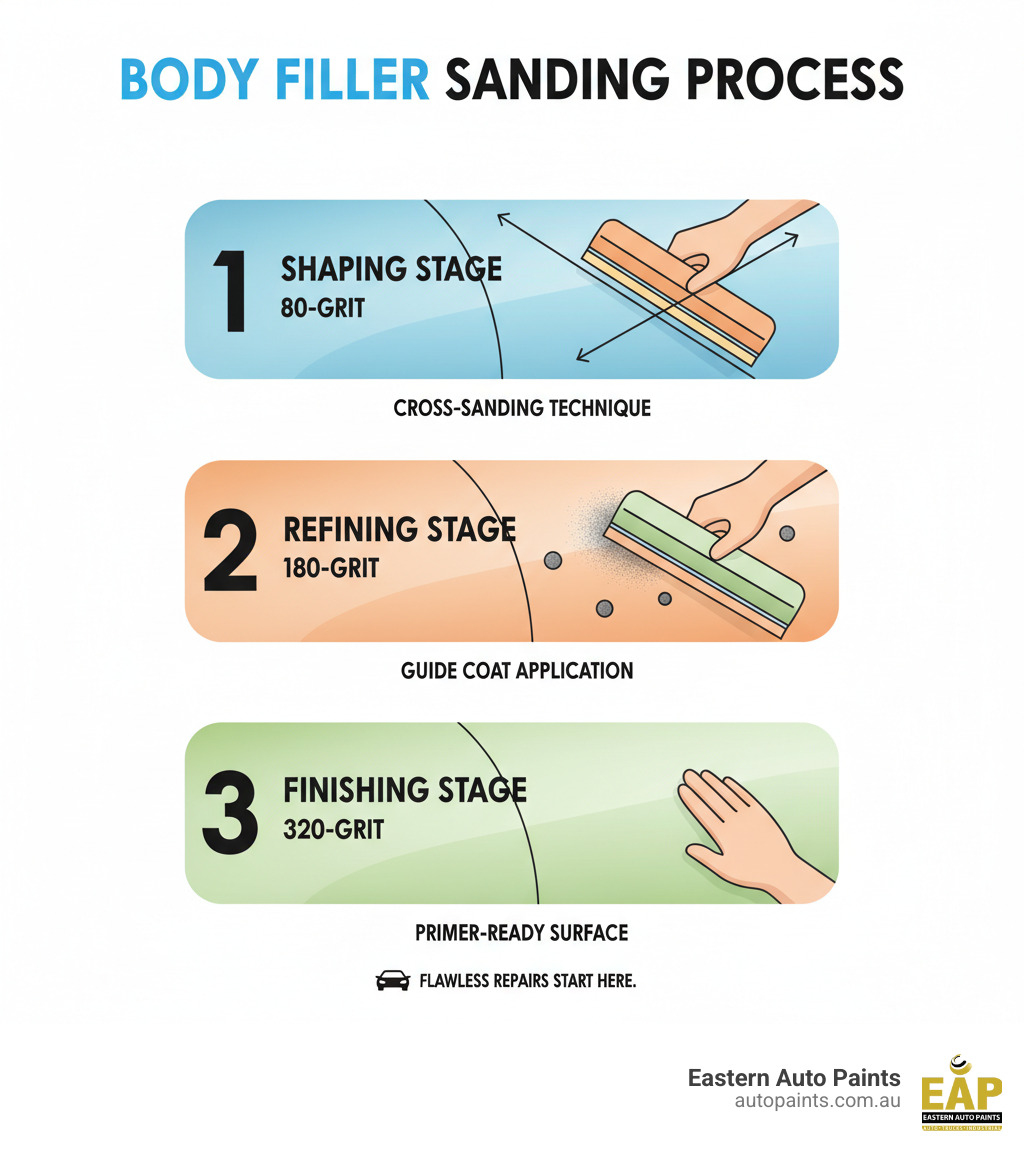
- Shaping Stage - Start with 80-grit sandpaper on a long sanding block to remove excess filler and establish the basic contour. Use a cross-sanding technique to avoid following existing waves.
- Refining Stage - Switch to 180-grit sandpaper to smooth out the coarse scratches and continue shaping the surface. A guide coat helps identify remaining low spots.
- Finishing Stage - Progress to 320-grit sandpaper to create a smooth, primer-ready surface. The filler should feel completely flat and blend imperceptibly into the original panel.
- Priming Stage - After applying automotive primer, sand with 600-grit sandpaper to eliminate any texture or imperfections before paint application.
Body filler itself is a two-part polyester resin mixed with a cream hardener that chemically cures into a hard, sandable compound. It's designed to fill dents, scratches, and surface irregularities that remain after metalwork is complete. The filler goes on as a creamy paste, but once cured, it becomes rock-hard and requires proper sanding techniques to achieve the smooth, level surface that high-quality paint demands.
The sanding process is where most amateur repairs fail. Apply filler perfectly, but sand it poorly, and you'll end up with waves, low spots, or visible edges that telegraph through even the best paint job. Professionals understand that body filler sanding isn't just about making things smooth. It's about creating a surface that's geometrically correct, properly feathered, and completely level with the surrounding metal.
The progression from coarse to fine sandpaper grits isn't arbitrary. Each stage serves a specific purpose. Coarse grits like 80-grit remove material quickly to establish shape. Medium grits like 180-grit refine that shape and remove the scratches left by coarser paper. Fine grits like 320-grit create the final surface texture that allows primer to bond properly without visible scratch patterns showing through your topcoat.
I'm James Maranis, and over three decades in the automotive paint industry, I've seen countless repairs ruined by improper body filler sanding techniques, from rushed block sanding to skipping crucial grit progressions. Understanding the science behind each sanding stage transforms body filler sanding from guesswork into a predictable, professional process.
The Step-by-Step Process for Flawless Body Filler Sanding
Getting body filler sanding right isn't about rushing through the process. It's about understanding each stage and why it matters. Most repairs fail not because of poor filler application, but because the preparation and sanding stages were rushed or done incorrectly. We've found that most adhesion issues come down to poor surface preparation, so that's exactly where we'll start.
Step 1: Choosing Your Materials and Preparing the Surface
Before you even open that tin of filler, you need to understand what you're working with and prepare your surface properly. Body filler is a polyester resin-based putty that, when mixed with a cream hardener, cures into a hard, sandable surface. It's designed to fill dents, scratches, and surface imperfections that remain after any metalwork is complete.
Not all body fillers are created equal, and choosing the right one makes a significant difference to your final result. Lightweight fillers are perfect for minor repairs and smaller surface imperfections. They're easy to sand and work well for finishing work. Premium fillers often contain aluminum particles, which give them superior strength and minimal shrinkage. These are your go-to choice for larger repairs where you need reliability and easier sanding. For serious structural work, fibreglass-reinforced fillers provide the extra strength needed for large dents, rust repairs, or tears in metal and fibreglass panels. You'll find the full range of professional-grade options in our Body Fillers collection.
Once you've selected your filler, surface preparation becomes absolutely critical. This isn't the time to cut corners. Start by thoroughly cleaning the repair area with a degreaser. Every trace of wax, grease, dirt, and grime needs to go. Wipe the area completely dry with a lint-free cloth.
Here's something we stress to every customer at Eastern Auto Paints: never, ever apply filler over rust. If rust is present, it must be completely removed first. Rust continues to grow underneath filler, eventually causing your repair to fail. Use mechanical abrasion or a chemical rust converter to eliminate every trace. Our Rust Repair & Prevent range includes products specifically designed to handle rust before you begin your repair.
The final preparation step involves creating the right surface texture for the filler to grip. Sand the repair area with 80-grit sandpaper, working down to bare metal or fibreglass. If you're working over existing paint, you'll need to remove it completely. Filler simply doesn't bond reliably to old paint. Sand in a circular pattern to create a rough profile that gives the filler something to grab onto. This "tooth" is essential for long-term adhesion. You'll also want to feather the edges of the existing paint, creating a gradual transition that won't show through your final finish. For larger areas requiring significant paint removal, check out our Paint Stripping solutions.
Step 2: Mixing and Applying Body Filler Like a Pro
With your surface properly prepared, you're ready to mix and apply the filler. This stage determines whether your repair will be strong and durable or plagued with pinholes and adhesion problems. For a comprehensive guide to application techniques, have a look at our article on How to Bodyfiller Like a Pro.
The mixing ratio is absolutely critical. Most body fillers work on a ratio of roughly ten parts filler to one part hardener by volume. Always check the manufacturer's instructions on your specific product, as ratios can vary. Too little hardener means the filler won't cure properly and will remain soft. Too much hardener causes the filler to cure too quickly, can generate excessive heat, and often creates pinholes that will haunt you later.
Use a clean, non-porous mixing board. Never use cardboard, as it absorbs resin and can introduce contaminants into your mix. Dispense your filler onto the board, then add the correct amount of hardener. The mixing technique matters more than you might think. Rather than stirring in circles, which traps air bubbles, use a folding motion. Press down firmly with your spreader, pull the material across the board, then fold it over itself. This kneading action mixes the components thoroughly while working out air bubbles that could create pinholes. Keep folding until all colour streaks disappear and you have a completely uniform blend.
Body filler has a limited pot life, typically just a few minutes depending on temperature. Mix only what you can apply before it starts to harden. Working time varies with ambient temperature, so on warm days, mix smaller batches.
When applying the filler, use a plastic or metal spreader and work with firm, deliberate strokes. Apply thin, even layers, pressing firmly to ensure the filler makes complete contact with the prepared surface. This eliminates air gaps that could cause adhesion problems. For deeper repairs, resist the temptation to glob on a thick layer. Instead, build up the repair in multiple thin layers, allowing each to cure before applying the next. Keep your total filler thickness under 6 millimetres (1/4 inch), with 3 millimetres (1/8 inch) being ideal for best results.
As you apply each layer, feather the edges carefully. This means gradually thinning the filler as it extends beyond the repair area, creating a smooth transition to the surrounding panel. The more attention you pay to feathering during application, the less body filler sanding you'll need to do later.
Step 3: The Art of Shaping and Initial Body Filler Sanding
After the filler has cured, typically 15 to 20 minutes depending on temperature and the amount of hardener used, the real work begins. This is where body filler sanding transforms from theory into practice.
For larger repairs with significant filler buildup, you can start with a coarse file or "cheese grater" style tool to quickly remove bulk material. This saves time and reduces the amount of heavy sanding needed. Once you've knocked down the major high spots, it's time to bring out the sandpaper.
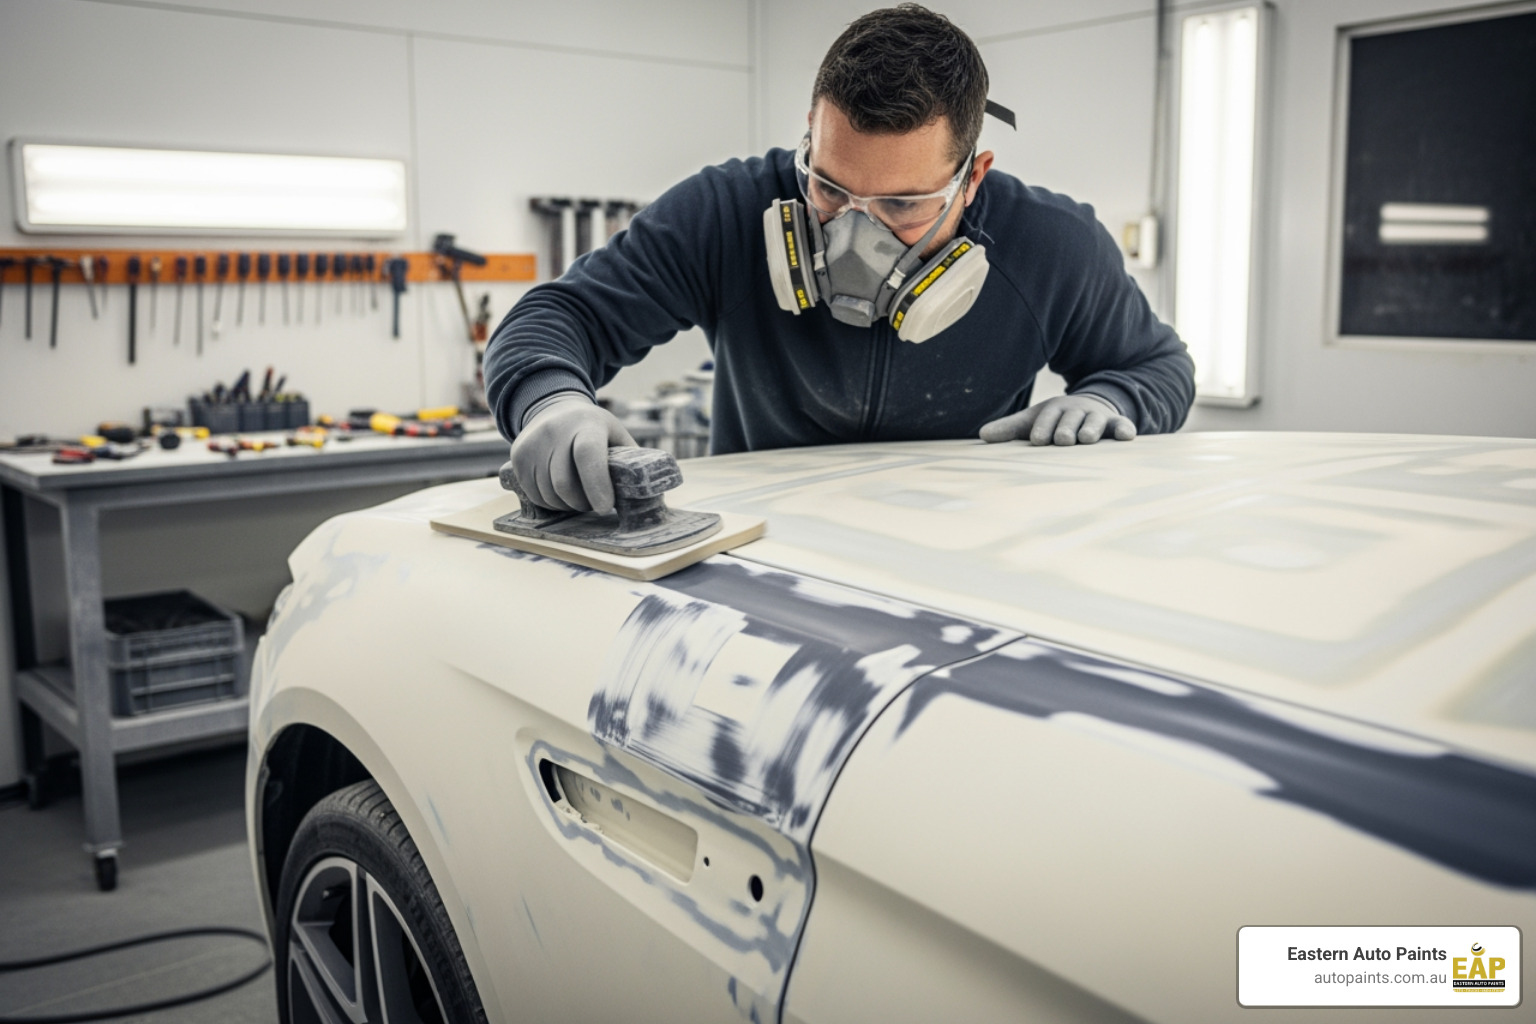
The first sanding stage uses 80-grit sandpaper. This coarse grit cuts through cured filler quickly, allowing you to establish the basic contour of your repair. Here's where proper technique becomes crucial. Always use a long sanding block for this stage. A sanding block distributes pressure evenly across the surface, preventing you from creating dips and waves that your hand alone would cause. The block keeps you honest, revealing the true shape of the surface.
Don't fall into the trap of sanding in just one direction. When you sand back and forth in a single direction, the block tends to follow existing waves and contours, actually making them worse. Instead, use a cross-sanding technique. Sand at one diagonal angle across the repair, then switch to the opposite diagonal. This alternating pattern helps level the surface effectively, cutting down high spots regardless of which direction they run.
For larger, flatter areas, a dual-action (DA) sander can be a real time-saver during initial knockdown. However, don't try to achieve your final shape with power tools. Leave the filler slightly high, then switch back to your long sanding block and manual sanding for precision work. The block gives you the control and feel you need to create a truly flat surface. You'll find everything you need in our Sanding Sheets & Discs collection, along with quality Sanding Blocks that make the job easier.
Step 4: Refining the Surface and Final Body Filler Sanding
With the basic shape established, you're ready to refine the surface and create that perfect, seamless transition. This stage of body filler sanding separates amateur repairs from professional results.
Before you continue sanding, apply a guide coat over your work. A guide coat is a fine, contrasting powder or spray that acts as your quality control inspector. As you sand, the guide coat disappears from high spots while remaining in low spots and scratches. This gives you instant visual feedback, showing exactly where more work is needed. If guide coat remains in an area after sanding, you've found a low spot that may need a skim coat of glazing putty or additional filler. The guide coat doesn't lie, making it an invaluable tool for achieving a truly flat surface.
Now switch to 180-grit sandpaper. This medium grit refines the shape you created with 80-grit, removing those coarse scratches and smoothing the surface further. Continue using your sanding block and the cross-sanding technique. The goal at this stage is to eliminate all visible 80-grit scratch marks. Run your hand over the surface frequently. Your fingers will detect subtle imperfections your eyes might miss. Some professionals place a thin cloth between their hand and the surface to improve sensitivity to irregularities.
Many experienced technicians apply a thin coat of polyester glazing putty at this stage. This finer material sands easier than regular body filler and feathers out beautifully, making it perfect for achieving an ultra-smooth final surface.
For the final smoothing before primer, progress to 320-grit sandpaper. This fine grit creates a surface that's perfectly smooth and ready for primer adhesion. Make absolutely certain you've removed all 180-grit scratches at this point. Any scratches that remain will show through your primer and paint, requiring you to start over.
The transition between your filler and the original panel should be completely seamless. When you close your eyes and run your hand across the repair, you shouldn't be able to feel where the filler begins or ends. That's the standard you're aiming for. Explore our full range of Sanding Sheets to find the grits you need for every stage of finishing.
Step 5: Priming and Finishing for a Seamless Result
The final step in the body filler sanding process is preparing your repair for paint through proper priming. This stage is where all your careful sanding work gets protected and prepared for the topcoat.
Primer serves several critical functions that many people underestimate. It acts as a bonding agent, creating strong adhesion between your filler and the paint that will eventually cover it. Primer also fills the minor sanding marks left by 320-grit sandpaper, creating a perfectly smooth surface. It provides a uniform colour and texture, preventing the underlying repair from showing through your final paint. Many primers also offer corrosion protection, safeguarding any exposed bare metal from rust.
The type of primer you choose depends on your specific situation. For bare metal areas where corrosion resistance is paramount, an etch primer creates a chemical bond with the metal and provides excellent protection. Products like PPG's Protec PPG Grey/Black Etch Primer or Concept 103 Etch Primer are excellent choices for this application. For areas where you need to fill minor imperfections and create a smooth base over filler, a high-build primer surfacer works beautifully. These primers offer faster fill-in for small surface irregularities. We also stock EPO Epotec Primer Surfacer, which is known for its excellent build and sanding properties. For more guidance on selecting the right product for your project, have a look at our guide A Practical Guide to Choosing Auto Paint Primers.
Before applying primer, clean your sanded filler thoroughly to remove every trace of dust. A tack cloth is your best friend here. Apply primer in thin, even coats, holding your spray gun or aerosol can 15 to 25 centimetres (6 to 10 inches) from the surface. Use a consistent, sweeping motion with each pass. Allow adequate flash time between coats as specified by the manufacturer, typically around 10 minutes. This gives solvents time to evaporate and prevents runs or sags. We offer a comprehensive range of 2K Primers for professional results, along with convenient Primer Aerosol options for smaller projects.
Once the primer has fully dried and cured, check the manufacturer's recommendations for timing, as this can range from 30 minutes to 24 hours, it's time for the final sanding stage. Lightly sand the primer with 600-grit sandpaper to eliminate any imperfections like bumps, texture, or overspray. The goal is an incredibly smooth surface, free of any texture, ready to receive your topcoat. Be careful not to sand through to the filler or bare metal, or you'll need to re-prime those areas.
Avoiding Common Mistakes and Mastering Best Practices
Even with the best intentions and careful technique, body filler sanding can go wrong. The difference between a professional-looking repair and one that haunts you every time you walk past your car often comes down to understanding where things typically go sideways and how to prevent those issues before they happen.
Common Pitfalls and How to Prevent Them
The most frustrating mistake we see is sanding scratches showing through paint. Picture this: you've spent hours on your repair, applied beautiful paint, and then a few days later, those deep scratch marks start appearing like ghosts through your glossy finish. This happens when you leave coarse scratches (typically from 80-grit paper) in the filler and hope that primer will magically fill them. It won't. Primer shrinks as it cures, and those scratches will telegraph right through to your topcoat. The solution is simple but requires patience. Always work through your grit progression methodically. Those 80-grit scratches need to be completely removed with 180-grit, and then those 180-grit marks need to be eliminated with 320-grit before you even think about primer.
Primer shrinkage issues go beyond just revealing scratches. We've found that many DIY enthusiasts rush this stage, applying just one thin coat of primer and immediately sanding it. Primer needs time to fully cure and shrink. Apply two to three even coats, allowing proper flash time between each, and then give urethane primer at least 24 hours to cure completely before you start block sanding. Otherwise, you'll sand it smooth, walk away feeling proud, and return the next day to find those imperfections have reappeared as the primer finishes its shrinking process.
Waves and lumps in your finished repair are the telltale signs of improper block sanding technique. When you sand in only one direction, your block follows the existing contours of the panel, including any waves you've inadvertently created. A short block or uneven pressure compounds the problem. The cross-sanding technique we discussed earlier, using a long sanding block with alternating diagonal passes, is your insurance policy against this issue. Your hand naturally wants to follow existing curves, so forcing yourself to change direction helps you catch and correct these problems while you can still fix them easily.
Those annoying pinholes that appear after sanding are usually self-inflicted wounds from the mixing stage. When you stir body filler vigorously like you're whipping cream, you trap air bubbles throughout the mixture. These bubbles cure into tiny voids that only reveal themselves once you've sanded down to them. By that point, you're either applying a skim coat of glazing putty or starting over. Remember to fold and pull the filler with your spreader, using downward pressure to knead out any air rather than stirring it in. Also, over-catalyzing the filler (adding too much hardener) can cause it to cure too quickly, generating heat and gas bubbles. Stick to the manufacturer's recommended ratio.
Poor adhesion from inadequate preparation is perhaps the most preventable mistake, yet it's surprisingly common. Filler simply won't stick to dirty, greasy, or rusty surfaces. It also won't bond properly to shiny paint or smooth metal. We cannot stress this enough: the time you spend on surface preparation directly determines how long your repair lasts. Clean thoroughly with a degreaser. Remove every trace of rust. Sand to create a rough profile that gives the filler something to grip. If you skip these steps, you might get away with it initially, but the repair will eventually fail, and you'll be doing it all over again.
The temptation to apply filler too thick is understandable when you're staring at a deep dent. You want to fill it in one go and move on. But applying filler thicker than 6 millimetres (1/4 inch) in a single layer creates problems. The chemical reaction that cures the filler generates heat, and in thick applications, this heat can't dissipate properly. The result is cracking, incomplete curing, and excessive shrinkage that leaves you with a depression where you thought you had a repair. Build up deep repairs in multiple thin layers, allowing each to fully cure before adding the next. Yes, it takes longer, but the repair will last.
Safety precautions deserve serious attention when working with body filler and sanding materials. The polyester resin and hardener in body filler release fumes that you definitely don't want to breathe. Always work in a well-ventilated area, ideally outdoors or in a workshop with proper exhaust ventilation. A quality respirator isn't optional, it's essential. You're dealing with both chemical vapors from the filler and fine dust particles from sanding. For spray applications, particularly with primers and paints, standard respirators are often insufficient. Atmosphere-supplying systems like Powered Air Purifying Respirators (PAPR) are commonly required for professional work. Always conduct a proper workplace risk assessment to determine what level of protection you need. Our range of PPE Masks offers excellent protection options for various applications.
Beyond respiratory protection, wear safety glasses to shield your eyes from dust and chemical splashes, and use chemical-resistant gloves whenever you're handling hardener. That cream hardener can cause chemical burns if it contacts your skin, and it's far easier to wear gloves than to deal with painful skin irritation.
Mastering body filler sanding is a journey, not a destination. Each repair teaches you something new about reading the surface, controlling your pressure, and recognizing problems before they become permanent. At Eastern Auto Paints, with over 34 years in the industry, we've helped countless professionals and DIY enthusiasts work through these challenges. We're a leading supplier of automotive, truck, and industrial paints throughout Victoria, and our advanced colour-matching technology ensures your repair blends seamlessly once you've perfected that surface.
The techniques and materials we've discussed throughout this guide will get you to a professional-grade finish, but achieving a perfect colour match over your beautifully prepared surface is its own specialized skill. For detailed guidance on that crucial final step, explore our Professional Tips for a Perfect Car Colour Match on Vehicles. If you have questions about your specific project, need advice on product selection, or want to discuss the best approach for a challenging repair, our expert staff are always here to help. Feel free to Contact our team directly. We look forward to helping you achieve a flawless finish that you'll be proud to show off.