
Getting Your Vehicle Surface Ready for Primer
Why Proper Sanding Creates a Reliable Primer Bond
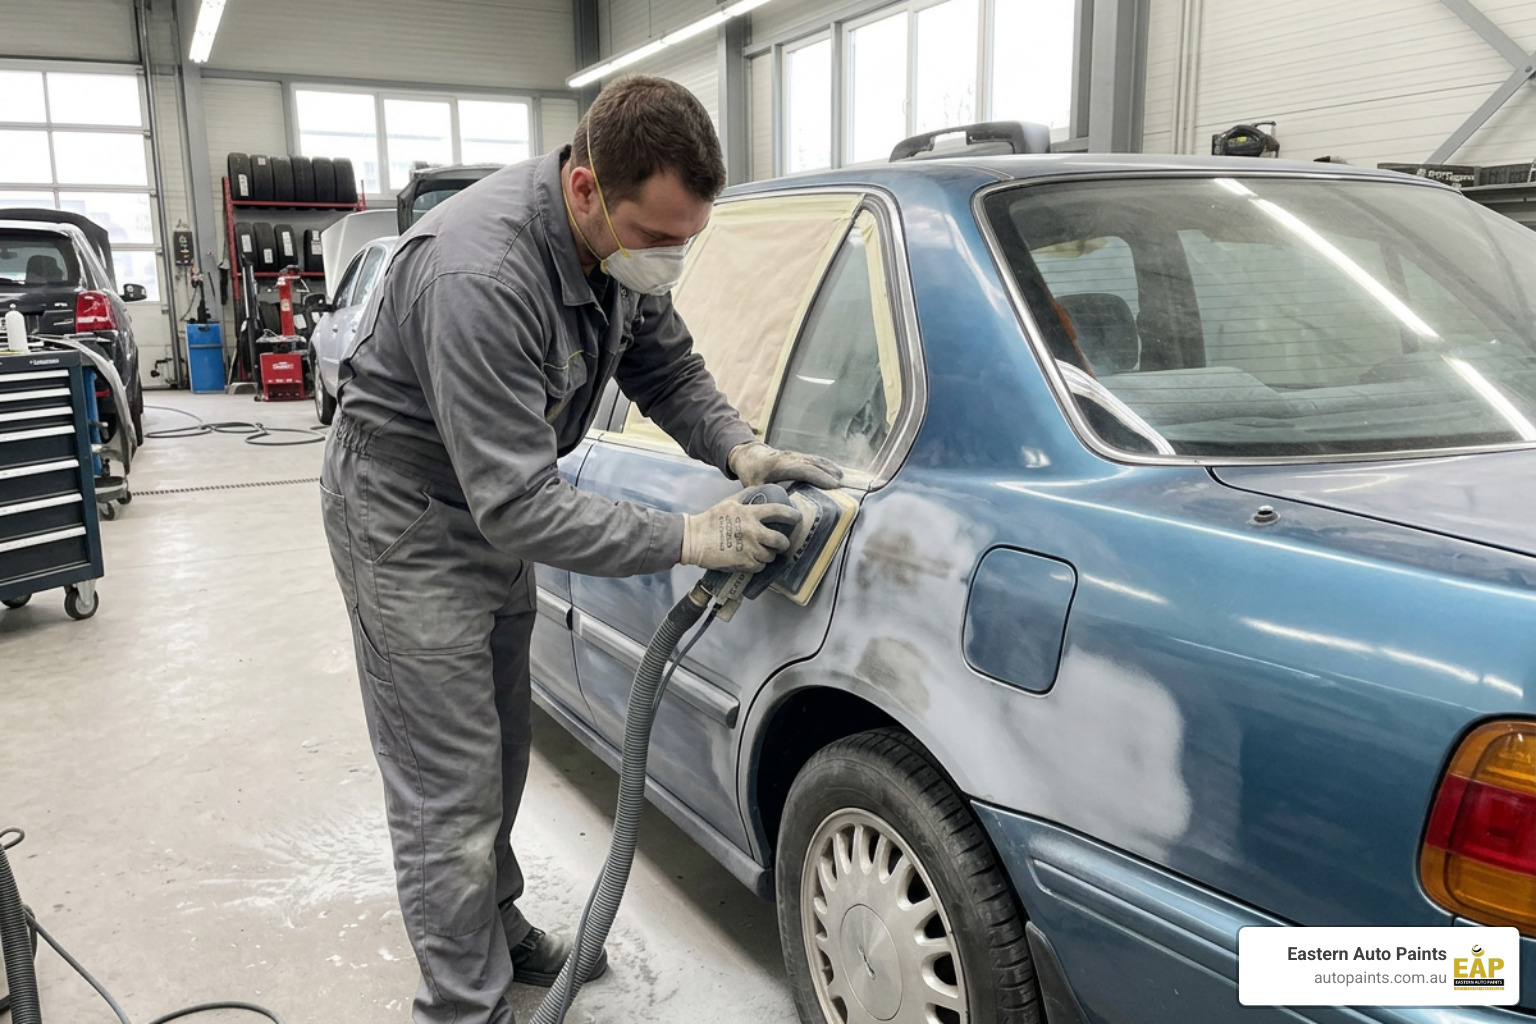
At Eastern Auto Paints (EAP), we know that sanding a car for primer can be the difference between a smooth, durable refinish and a coating that shows scratches, ripples or adhesion issues later. The goal is simple: clean the panel, remove failed coatings or corrosion where necessary, and create an even, dull scratch pattern that gives the primer a consistent mechanical key.
Key Takeaways:
- Clean and degrease before sanding so contaminants are not worked into the surface.
- Strip only damaged, rusty or failing areas. Sound paint usually needs thorough scuffing, not complete removal.
- Use a dual-action sander for broad areas, then use blocks to keep flat panels flat.
- Refine each scratch pattern before moving to a finer abrasive.
- Inspect under good lighting and remove sanding dust before priming with products from Sanding and Repair Products.
We support professional refinishers and serious vehicle restorers with practical advice on abrasive selection, panel preparation and compatible coating systems. Our approach focuses on the substrate beneath the paint, whether you are working with bare metal, body filler, plastic or an existing finish.
Good preparation is not about making a panel feel smooth with your fingertips alone. It is about producing an even surface, protecting panel edges and identifying low spots before primer makes them harder to correct. That careful process helps primer perform as intended and gives the next coating layer a dependable foundation.
Key sanding a car for primer vocabulary:
Why This Issue Should Not Be Ignored
Overlooking early surface preparation leads directly to paint failure. If primer is sprayed over unsanded gloss, greasy residue or poorly feathered edges, the new coating cannot build a reliable mechanical key. This results in edge-lifting, micro-blistering, flaking and unsightly sand scratches telegraphing straight through your topcoat.
Taking the time to prep the substrate correctly guarantees that high-build surfacers, etch primers, or epoxy barriers lock into the panel. It also prevents chemical reactions between incompatible older paint layers and modern two-pack (2K) refinish systems.
Essential Tools and Prep Equipment for Sanding a Car for Primer
Achieving a uniform, flat substrate requires a combination of mechanical tools, hand-blocking accessories, specialised abrasives and clean preparation chemicals. Relying on fingertips alone or using unbacked abrasives creates waves and grooves that show under high-gloss clearcoats.
- Random Orbital / Dual-Action (DA) Sanders: Excellent for efficient material removal across broad, flat surfaces such as bonnets, roofs and lower quarter panels.
- Hand Sanding Blocks: Rigid and semi-rigid blocks ensure consistent downward pressure across wide sections. The Velocity Sanding Block provides firm support to level high spots without gouging. For custom curves and body lines, specialised Sanding Blocks keep the abrasive flat across distinct contours.
- Prep Solvents and Degreasers: High-grade wax and grease removers dissolve road grime, silicone, tar and oil before any abrasive touches the panel.
- Abrasive Selection: Professional-grade abrasive sheets and hook-and-loop discs ranging from coarse stripping grits to ultra-fine finishing grades.
- Personal Protective Equipment (PPE): Working with sanding dust and chemical degreasers requires proper safety gear. Rather than relying on generic recommendations, always check the product label, technical data sheet (TDS) and relevant SafeWork Australia or WorkSafe Victoria guidance for exact respiratory, eye and skin protection requirements.
- Clean-up Aids: Anti-static tack rags, lint-free microfibre cloths and oil-free compressed air lines.
Evaluating Different Substrates and Surface Repairs
Every automotive panel presents unique substrate requirements. Before choosing an abrasive or applying an undercoat, review How to Prepare Your Panel for Painting to assess the exact repair pathway.
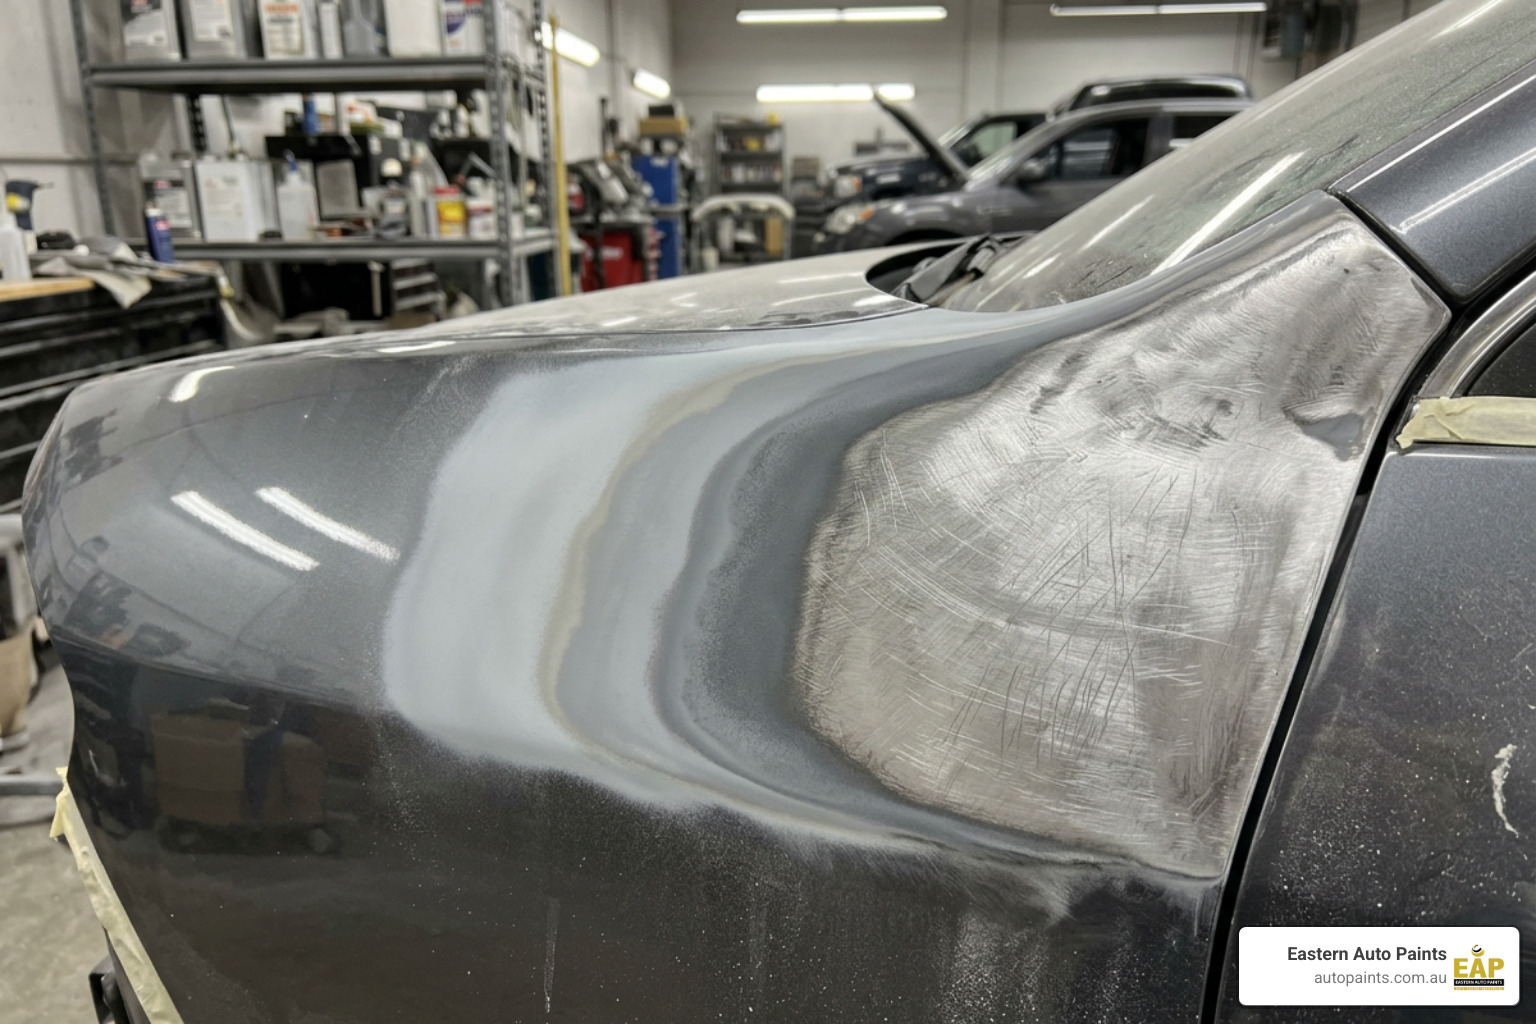
- Bare Steel: Requires the complete removal of oxidation, scale and micro-rust. Once cleaned and profiled, steel needs prompt protection with an appropriate etch or epoxy primer for rust prevention to stop flash rusting from taking hold.
- Aluminium Panels: Aluminium develops an invisible oxide layer almost instantly when exposed to air. It must be abraded cleanly and coated with an aluminium-compatible etch or epoxy primer according to the manufacturer's technical data sheet.
- Plastic Bumpers and Trims: Flexible plastics require careful scuffing to remove mould release agents without creating excessive heat that smears the plastic. They often require a dedicated adhesion promoter before primer application.
- Feather Edging Existing Paint: When stepping down from sound original paint to bare repair areas, taper each layer (clearcoat, basecoat, factory primer) into a wide, gradual slope. Abrupt paint edges will shrink, swell or map through new primers.
Addressing Body Filler and Bare Metal
Levelling polyester body filler demands a disciplined, step-down approach. For detailed guidance on shaping fillers without leaving coarse grooves, consult What Grit Sandpaper for Body Filler.
Begin by shaping cured filler with coarser abrasives to establish the true panel plane. Gradually step up through medium grits to eliminate coarse gouges. Never apply thin primer surfacers over coarse body filler scratches; the primer will initially bridge the gaps, only to shrink into the grooves as solvents evaporate. For bare metal surrounding the repair, ensure direct-to-metal prep leaves a clean, uniform mechanical tooth free of grease, corrosion or loose debris.
Step-by-Step Process for Vehicle Surface Preparation
A methodical workflow prevents rework and ensures every square centimetre of the panel is ready for primer.
- Initial Decontamination: Thoroughly wash the vehicle with dedicated automotive wash soap and clean water to remove water-soluble dirt and road grime. Dry completely.
- Solvent Degreasing: Apply wax and grease remover using the two-cloth method. Wipe the solvent on with one saturated lint-free cloth to lift contaminants, then immediately wipe it off with a second clean, dry cloth before the solvent evaporates.
- Feathering and Substrate Sanding: Feather back paint chips, repair spots or failing clearcoat using suitable sanding blocks or a DA sander. Work outward from the damage centre to create smooth, gradual transitions.
- Dry Intermediate Sanding: Work across the entire repair zone, refining scratch patterns with progressively finer grits to ensure uniform keying across both bare substrate and surrounding sound paint.
- Dust Extraction and Blow-down: Blow off all sanding dust using clean, dry compressed air, paying special attention to panel gaps, door jambs, swage lines and window rubbers.
- Final Solvent Wipe and Tack Ragging: Perform a final wipe down with a mild degreaser. Immediately before spraying primer, lightly pass an anti-static tack rag across the panel to collect stray airborne dust.
| Stage | Substrate / Layer | Primary Purpose | Tool / Technique |
|---|---|---|---|
| Initial Stripping / Shaping | Bare Steel / Heavy Filler | Rapid leveling, rust removal, shape correction | Rigid block or DA sander |
| Feather Edging | Step-down paint transitions | Blend paint edges into repair zone | Dual-action sander / semi-rigid block |
| Substrate Keying | Sound OEM paint / E-coat | Provide mechanical key for high-build primer | Medium hand block / abrasive pad |
| Primer Surfacer Leveling | Cured 2K primer surfacer | Remove orange peel, guide coat, level waves | Long rigid block (Cross-hatch pattern) |
| Final Primer Refinement | Cured primer before topcoat | Eliminate fine scratches before basecoat | Semi-rigid block / fine wet or dry sheet |
Choosing Grits for Sanding a Car for Primer
Selecting the right abrasive grading ensures proper mechanical tooth depth without creating scratches that show through the final paint film. Our range of Sanding Sheets covers all refinish stages.
When preparing substrates prior to spraying primer:
- Use medium abrasives (such as P180 to P240) to feather repair edges and establish initial levelling over body filler or bare steel.
- Progress to finer grades (such as P320 to P400) to key sound existing paint and refine coarser sanding marks before applying high-build primer surfacers.
- Avoid using overly fine abrasives (finer than P400) when prepping substrates for high-build primers, as the surfacer requires an adequate mechanical profile to bond properly.
- Refer to the specific primer manufacturer's TDS for exact substrate grit recommendations.
Wet vs. Dry Techniques When Sanding a Car for Primer
Both wet and dry sanding methods have distinct roles in automotive refinishing:
Dry Sanding
When you'd use this: Ideal for initial substrate shaping, bare metal preparation, body filler work and initial primer blocking. Dry sanding prevents moisture from absorbing into porous polyester fillers or unsealed bare metal, eliminating the risk of micro-rust or blistering. When paired with modern dust-extraction systems, dry sanding keeps the work area clean and allows immediate visual inspection of the scratch pattern.
Wet Sanding
When you'd use this: Well-suited for intermediate and final refinement of fully cured 2K primers before basecoat application. Using Sunmight Wet & Dry Sanding Sheets with clean water and a drop of pH-neutral soap lubricates the cut, extends abrasive life and prevents fine primer dust from clogging the paper.

Technique Decision Guide
Use dry sanding exclusively on bare steel, aluminium, polyester fillers and intermediate high-build primer blocking. Transition to wet sanding only on fully cured, non-porous primer surfacers when completing the final pre-topcoat smoothing stage.
Using Guide Coats to Verify Surface Flatness
Even the sharpest eyes cannot detect minute surface ripples, pinholes or subtle low spots on a solid grey primer. Applying Car-Rep Guide Coat Aerosol provides an instant visual map across the panel.
Dust a light, contrasting mist of guide coat over the entire primed surface. When you block sand using a steady, overlapping cross-hatch pattern at a 45-degree angle, the sanding block removes the guide coat from high spots while leaving dark powder in low spots, scratches and pinholes. Continue blocking evenly until the guide coat disappears uniformly, confirming a flat, ripple-free panel.
Common Mistakes to Avoid During Primer Preparation
- Skipping Grit Stages: Jumping directly from coarse abrasives to fine finishing sheets leaves deep grooves bridged over rather than eliminated. Always step through sequential grits.
- Excessive Finger Pressure: Sanding with bare fingers presses the abrasive directly into low spots and creates distinct finger channels. Always use a proper block.
- Edge Burn-Throughs: Panel edges, style lines and swage creases carry thinner paint and higher block pressure. Tape off sensitive body lines and sand edges lightly by hand.
- Inadequate Degreasing: Wiping solvent around without immediately drying it spreads grease rather than removing it, causing fish-eyes and adhesion failure.
- Rushing Cure Windows: Sanding primer before it has fully cured causes the abrasive to clog with sticky residue, pulls primer from the substrate and leads to shrinkage. Always verify drying times on the manufacturer's TDS.
Common Symptoms, Challenges, or Questions
Refinishers often face common prep challenges:
- Why did my primer lift at the edge? This usually stems from poor feather edging, unsanded gloss along the repair perimeter, or solvent entrapment.
- Why do sand scratches show after applying clearcoat? This occurs when primer is sprayed over coarse unrefined scratches, or when the primer was sanded with too coarse a grit before topcoating.
- How do I manage body lines? Sand parallel to sharp body creases rather than across them, using flexible interface pads or tape lines to protect sharp profiles.
What a Personalised Experience Actually Looks Like
At Eastern Auto Paints, we work directly with trade painters and automotive restorers to tailor preparation setups for specific vehicle projects. Whether you are dealing with a vintage bare-metal restoration, an aluminium bonnet repair or modern thermoplastic polyolefin (TPO) plastic bumpers, we help you choose the right abrasives, guide coats and compatible undercoats.
Our Melbourne counters provide hands-on product guidance, helping you select the exact block profiles, grits and cleaning solvents needed to ensure your paint jobs spray smoothly and hold up over time.
The Value of Consistency and an Ongoing Relationship
Consistency in preparation delivers predictable, high-grade refinish results. Using reliable abrasives, professional-grade degreasers and matched primer systems eliminates costly rework and coating failures.
By partnering with Eastern Auto Paints over the long term, workshop owners and dedicated hobbyists gain continuous access to technical advice, dependable product stocking, and updated application guidance aligned with the latest coating technologies.
What to Expect at Eastern Auto Paints
When you source your refinish supplies through Eastern Auto Paints, you can expect:
- A comprehensive selection of professional Automotive Primers covering 1K, 2K, etch, epoxy and high-build surfacer formulations.
- High-durability abrasives, interface pads and ergonomic sanding blocks designed for trade bodywork.
- Advanced colour matching technology and factory formulations for basecoats and topcoats.
- Direct technical support from experienced team members who understand spray equipment, surface prep and drying dynamics.
When to Get in Touch or Take Action
If you are planning an upcoming panel repair, complete respray or custom build, addressing surface preparation early will save significant time and materials. Speak with our team to map out your abrasive grits, cleaners and primer systems before you begin stripping panels.
Contact our team or visit our Victorian branches in Bayswater and Dandenong South to discuss your project requirements with our specialist team.
Explore our dedicated range of undercoats and preparation products:
- Automotive Primers & Fillers Collection
- 1K Primer Products
- 2K Primer Range
- Primer Aerosols
- Body Fillers Collection
- Abrasive Sanding Sheets
- Abrasive Sanding Discs
Frequently Asked Questions About Sanding for Automotive Primer
Should I sand down to bare metal or just scuff the existing paint?
You do not need to strip an entire panel to bare metal if the existing finish is structurally sound, well-adhered and free of cracks, rust or clearcoat delamination. Sound factory coatings provide an excellent base that simply requires thorough cleaning and uniform scuffing with a suitable medium-to-fine abrasive to create a mechanical key. Bare metal stripping is necessary only when removing rust, addressing failing paint, repairing significant body damage or when the underlying paint system is unknown and poses a risk of solvent reaction.
How do I know when the surface is ready for primer?
A surface is properly prepared for primer when it displays a completely uniform, dull finish with no remaining glossy patches, shiny edges or coarse stray scratches. Inspect the panel under strong, angled raking light to spot uneven profiles. After thoroughly degreasing and removing dust, the panel should be completely clean, dry and uniformly abraded across every contour and edge.
Do I need to sand between coats of primer?
You generally do not need to sand between individual coats of the same primer if they are applied within the specified flash-off and recoat windows stated on the manufacturer's technical data sheet. Successive coats applied within this window chemically bond to one another. Sanding is required only after the final coat of primer surfacer has cured fully, at which point it is block sanded with a guide coat to achieve total panel flatness before topcoating.
What is the difference between dry sanding and wet sanding primer?
Dry sanding is typically used for initial levelling and shaping of high-build primer surfacers because it allows easy use of guide coats and works seamlessly with dust-extraction equipment. Wet sanding is often chosen for final fine-grit smoothing prior to applying basecoat or topcoat, as water lubricates the cut, rinses away fine primer residue and prevents the abrasive paper from loading.
Can I sand primer without using a sanding block?
Sanding primer without a block is not recommended on flat or gently curved panels. Applying direct finger pressure causes the paper to follow existing ripples and creates visible finger grooves in the primer that transfer through to the topcoat. Always use a rigid, semi-rigid or flexible sanding block matched to the shape of the panel to maintain even pressure and ensure a truly flat finish.