
How to Apply Automotive Paint Filler the Right Way
Automotive Paint Filler: A Smooth Repair Starts Here
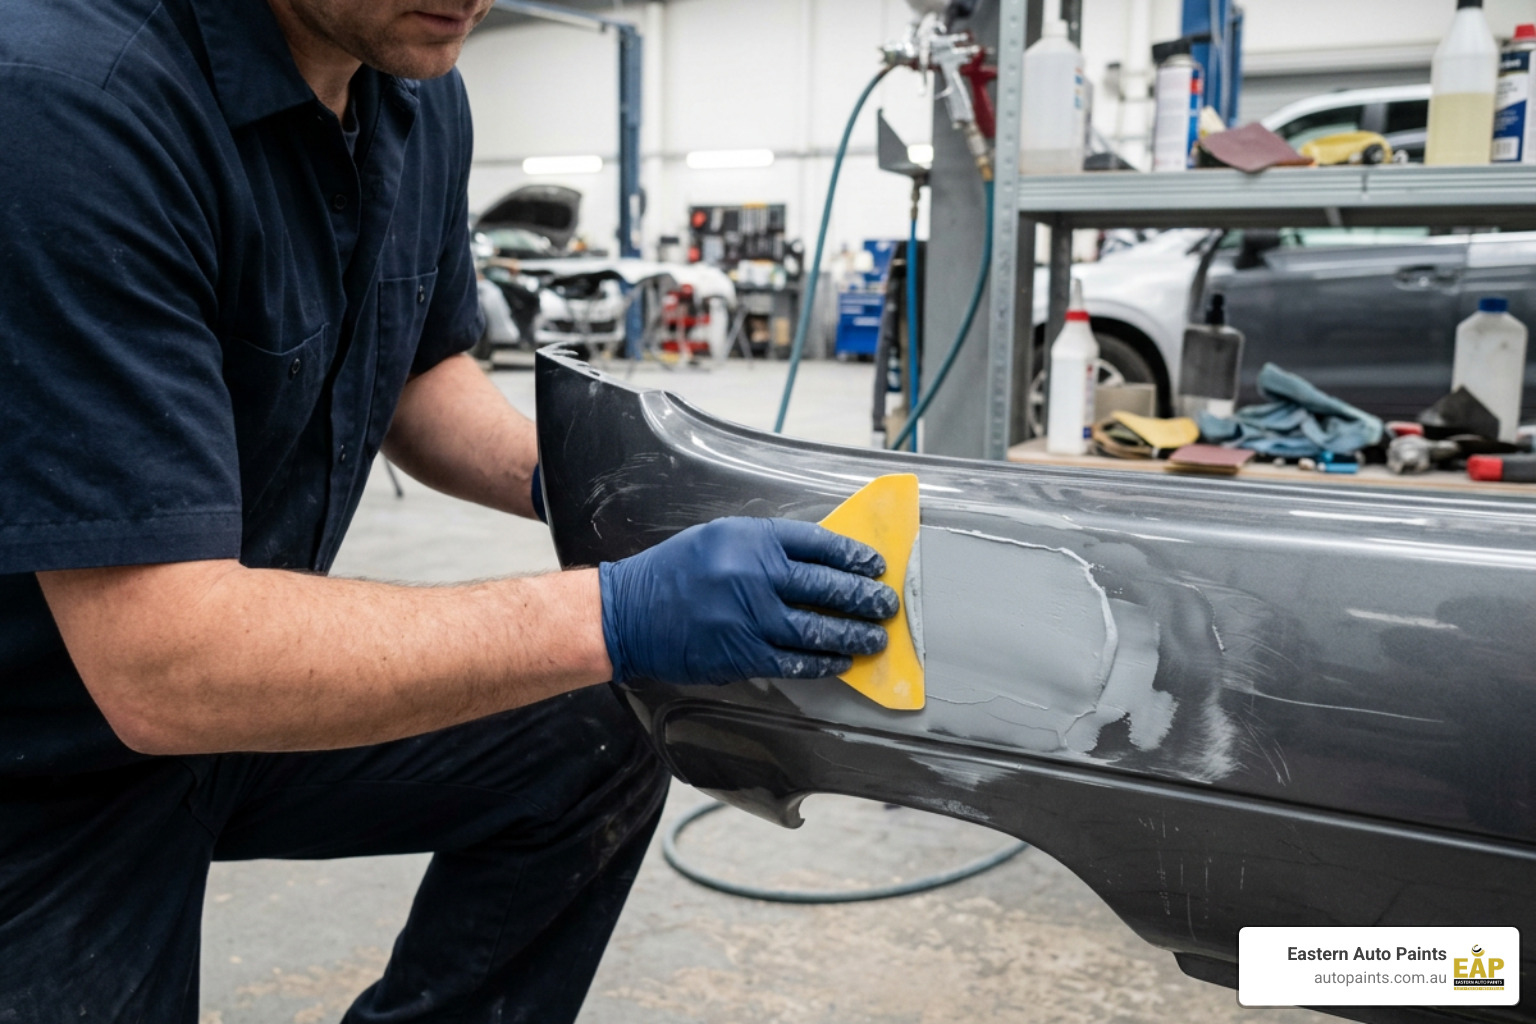
Automotive paint filler is a repair material used to restore shallow dents, scratches and minor surface imperfections before primer and colour are applied. Applied well, it helps create a flat, seamless panel surface; applied over poorly prepared metal, old paint or a damp repair, it can contribute to pinholes, visible edges and paint sinkage later.
Key Takeaways
- Body filler builds and reshapes low areas in a panel.
- Knifing putty, also called stopper, is for fine scratches and small pinholes rather than serious damage.
- Surface cleanliness, correct sanding and controlled curing matter as much as the filler itself.
- Start with our guide on how to use filler when planning a repair.
Eastern Auto Paints (EAP) supports trade applicators and serious restorers with automotive paint filler, abrasives, primers and practical product guidance. We focus on helping you choose compatible materials for the panel, repair depth and coating system involved.
A lasting repair comes from consistent preparation and careful attention at every stage, not simply adding more filler. Our approach is built around reliable surface repair products and clear technical support, so you can move into primer and paint with confidence.
Automotive paint filler glossary:
Why This Issue Should Not Be Ignored
Rushing through body repair work or applying automotive paint filler over questionable substrates leads directly to coating defects down the track. When filler is pressed into a surface contaminated with grease, moisture, or rust, the bond fails beneath the primer. Over time, thermal expansion and panel flexing cause topcoats to map, sink, or crack around repair boundaries.
Trapped moisture inside porous polyester filler is a primary cause of paint blistering. Because resin compounds expand and contract at different rates than steel or aluminium, poor surface preparation and improper resin cure leave repairs vulnerable to moisture ingress. Addressing panel damage with correct levelling techniques and compatible refinish systems protects the structural appearance of the panel and ensures a durable, professional result.
Common Symptoms, Challenges, or Questions
Technicians and restorers frequently run into practical challenges during body repair. Pinholes, ring-out edge mapping, uneven curing, and paint sinkage are common frustrations on the workshop floor. Understanding why these defects occur helps eliminate them early in the process.
- Pinholes appear when air is whipped into polyester paste during mixing or trapped during spreading.
- Edge mapping happens when solvents from topcoats penetrate feathered paint edges that were not properly feathered or sealed.
- Paint sinkage occurs when primer or filler continues to shrink after sanding because solvent or resin curing was incomplete before painting.
- Slow or tacky curing indicates uneven distribution of cream hardener or working outside recommended shop temperature ranges.
Addressing these issues requires structured surface preparation, steady application pressure, and adequate curing before moving on to sanding blocks and primer surfacers.
Selecting the Right Automotive Paint Filler for Panel Repairs
Selecting the appropriate filler compound depends on the substrate material, damage depth, and required finish density. Modern repair shops rely on specialised products within our body fillers collection to achieve efficient, stable panel repairs.
Heavy Body Filler Strengths
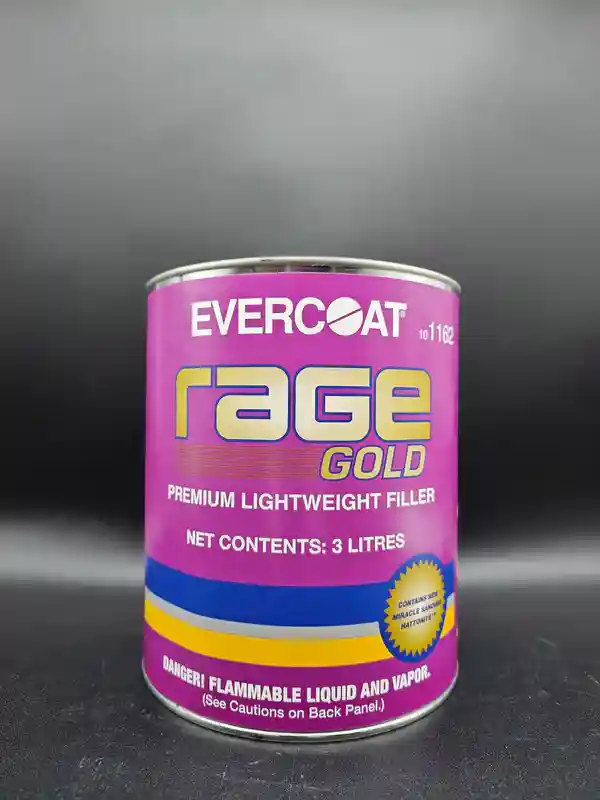
Heavy body filler is formulated with robust polyester resins that deliver strong vertical hold and deep filling capacity across broad steel and aluminium panels.
When you would use this:
- Bridging deeper depressions and minor structural panel shaping before final skimming.
- Restoring panel contours across wide metal surfaces where high build strength is required.
- Working on bare steel or repair areas requiring durable polyester matrix reinforcement.
Knifing Automotive Paint Filler Strengths
Knifing automotive paint filler, often called stopper or glazing putty, features a low-viscosity, high-density formulation designed for fine surface correction. Products like U-Pol Dolphin Glaze Putty offer ultra-smooth spreading for final skimming.
When you would use this:
- Filling light surface scratches, sanding marks, and micro-pinholes.
- Applying thin skim coats over feathered body filler transitions.
- Delivering a smooth surface texture that minimises prep time prior to primer application.
Filler Selection Decision Guide
Matching product properties to job conditions ensures efficient workflow and strong coating adhesion.
- Deep Dents and Major Reshaping: Heavy body filler provides structural bulk and panel stability.
- Light Surface Skimming: Lightweight polyester fillers like Concept Bodyfiller Lightweight balance easy sanding with smooth feathering capabilities.
- Pinholes and Scratch Sealing: Finishing putties and knifing glazes level surface micro-imperfections without adding unnecessary thickness.
- Galvanised and Aluminium Substrates: Substrate-specific body fillers containing flexible additives ensure long-term adhesion across active metal substrates.
When to Use Stopper and Finishing Putties
Finishing putties are designed strictly for ultra-thin applications. Applying knifing putty in thick layers leads to solvent trapping and deep shrinkage, as these compounds are engineered to skin rapidly. Putties packed in tubes keep air out between uses, preserving product usability for detail work, whereas tinned glazes allow quick mixing for larger skim areas.
Surface Preparation for Bare Metal, Painted Surfaces, and Welded Seams
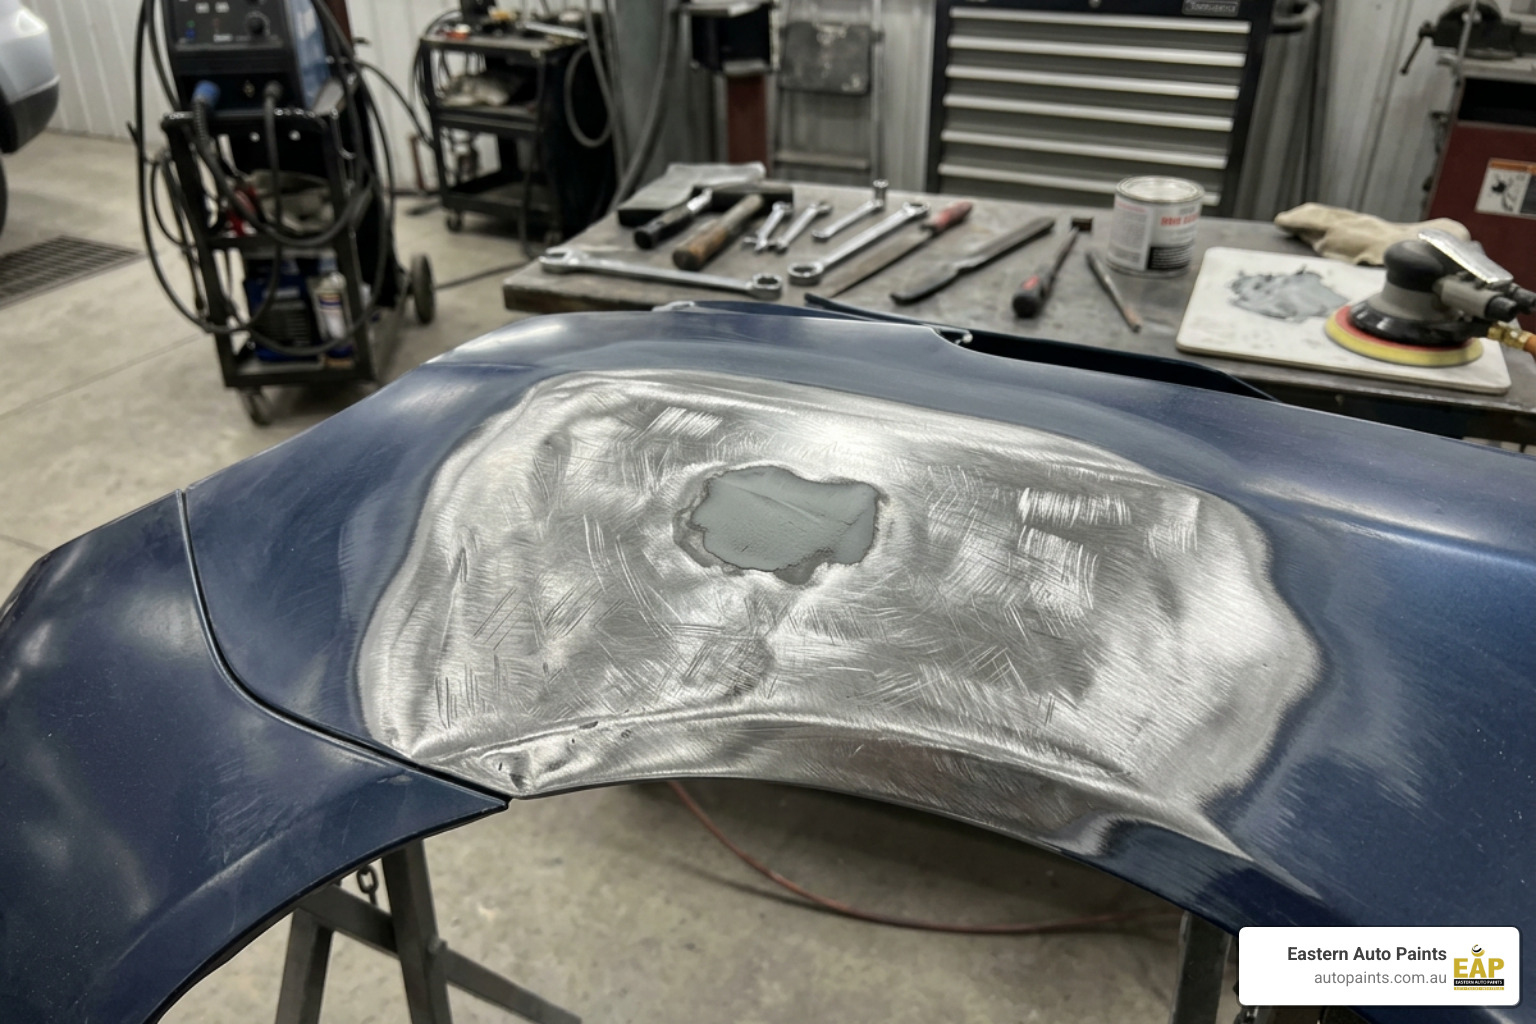
Thorough surface preparation is essential for long-lasting filler adhesion. Cleanliness and correct mechanical keying prevent edge lifting and premature coating failure.
| Surface Substrate | Mechanical Keying | Cleaning Protocol | Special Considerations |
|---|---|---|---|
| Bare Steel | Coarse grit sanding | Wax and grease remover | Remove all oxidation immediately before filling |
| Existing Paintwork | Feathered cross-hatch sanding | Solvent degreaser | Scuff back to sound, cured original equipment manufacturer (OEM) substrate |
| Welded Seams | Seam grinding and wire wheel | Solvent wipe and blowdown | Seal reverse side to block moisture ingress |
Preparing Bare Metal vs Painted Panels
Applying filler directly over bare metal requires complete removal of rust, mill scale, and residual oils. Mechanical keying creates a scratch profile that locks polyester resin into the steel. When working near existing paint lines, feathering edges smoothly prevents visible repair rings under fresh topcoats. For guidance on selecting keying abrasives, explore our review of coarse sanding pads auto.
When filling over cured painted panels, test the existing finish to confirm it is fully cured and stable. Soft or one-component (1K) coatings must be stripped back to metal, as filler resins can soften unstable substrates and cause adhesion loss.
Repairing Welded Seams and Moisture Prevention
Welded repairs demand strict inspection to prevent moisture from reaching the filler from behind. Microscopic pinholes in weld beads allow atmospheric moisture to travel through the seam, hydrating the porous polyester structure from underneath.
- Inspect welds thoroughly using back-lighting or solvent penetration checks to spot tiny seam holes.
- Grind weld crowns flush and clear all carbon deposits before applying filler.
- Treat and seal the reverse side of welded panels with quality rust repair products and dedicated seam sealers to stop moisture intrusion permanently.
Step-by-Step Application Techniques for Body Filler
Mastering application technique minimises air entrapment, speeds up block sanding, and creates smooth panel transitions.
Mixing Ratios and Spreading Methods
Correct hardener integration drives complete resin cross-linking. Always refer to the manufacturer's technical data sheet (TDS) or product label for exact mixing ratios, temperature windows, and working times before starting your repair.
- Place the required amount of filler paste onto a clean, non-porous mixing board.
- Add cream hardener according to the manufacturer's TDS instructions.
- Knead and fold the mixture firmly using smooth squeegee strokes rather than whipping it, which introduces air bubbles.
- Blend until a completely uniform colour with no hardener streaks is achieved.
Apply firm, angled pressure on the first coat using quality flexible spreaders from our plastic applicators 10-pack or durable metal filler applicators to force material into mechanical scratches and eliminate air pockets.
Using a Flexible Steel Rule for Smooth Panel Contours
On long or curved panels, a flexible steel rule acts as a contour tool and excess material scraper. Laying the rule across curved body lines reveals high and low spots instantly. Dragging the edge tightly across freshly spread wet filler scrapes away excess paste before it hardens, matching the panel curvature and drastically reducing subsequent block sanding effort.
Sanding and Levelling Techniques for Automotive Paint Filler
Sanding establishes true panel alignment. Using proper grit progressions and block techniques ensures flat surfaces without gouging channels into surrounding paint.
Recommended Sanding Grits and Block Techniques
Always use rigid or semi-flexible sanding blocks from our sanding blocks range to keep sanding action flat across the repair area. Direct readers to the product label or TDS for exact grit recommendations matching your chosen filler system.
- Coarse Sanding: Rough-shape cured filler to remove excess material and knock down high spots.
- Medium Refinement: Refine cross-hatch scratch patterns and blend filler transitions smoothly into surrounding metal.
- Fine Finishing: Sand skim coats and putties using premium sheets from our sanding sheets collection to prepare for primer surfacer.
- Machine Finishing: Use orbital sanding discs for final feather-edge blending across wide repair margins.
Hold sanding blocks at an angle to repair edges, working in a cross-hatch diagonal pattern. This technique prevents the hard edges of the block from cutting gouges into soft filler.
Dry Sanding Techniques for Automotive Paint Filler
Polyester body filler is inherently porous. Initial shaping stages must always be performed dry. Wet sanding early coats introduces water directly into micro-pinholes and raw resin. Trapped water remains hidden beneath primer until heat or sunlight forces it to expand, causing blistering and topcoat detachment later.
Clean dust out of sanding scratch profiles frequently using a stiff brush or clean compressed air blowdown to monitor repair flatnesses accurately.
Preventing Common Filler Defects and Preparing for Primer
A flawless paint job depends on isolating cured body filler beneath high-build primer surfacers before topcoat application.
Drying Times, Curing, and Moisture Control
Cure speed depends on ambient shop temperatures, substrate conditions, and exact resin formulations. Always consult the manufacturer's TDS for specified flash-off, full cure times, and temperature guidelines before sanding or applying subsequent coats.
In cooler workshop conditions, specialised infrared drying equipment provides controlled thermal energy to support complete cross-linking without overheating the panel surface.
Avoiding Pinholes, Sinkage, and Edge Rings
Defect-free refinishing requires precise surface sealing steps:
- Apply dry guide coat dust across sanded filler to highlight micro-pinholes and low spots instantly.
- Knife a thin layer of finishing glaze across highlighted pinholes using firm squeegee pressure.
- Feather repair boundaries cleanly into surrounding original paintwork to prevent halo edge mapping.
- Apply high-quality 2K primers or spot-repair 1K primer options to seal porous repair areas before topcoating.
- For specialised high-volume priming equipment insights, see our Airless spray guns complete guide.
What a Personalised Experience Actually Looks Like
Achieving invisible panel repairs involves selecting materials matched specifically to your workshop environment and project scope. At Eastern Auto Paints, tailored technical support means sitting down with experienced trade professionals who understand panel repair dynamics intimately.
Whether you are restoring a vintage vehicle panel or managing high-throughput collision repairs, our team provides step-by-step guidance on matching fillers, hardeners, and primer systems. We help evaluate shop ambient temperatures, substrate properties, and coating compatibility so you get consistent, predictable results on every job.
The Value of Consistency and an Ongoing Relationship
Reliability in automotive refinishing comes down to repeatable product performance and trusted technical support. Partnering with a dedicated supplier ensures access to consistent, professional-grade batches that react predictably under standard shop conditions.
Building an ongoing relationship with Eastern Auto Paints gives panel beaters and restorers reliable access to commercial technical data sheets, updated product technologies, and steady stock availability. This ongoing support keeps your workshop running smoothly and protects the long-term quality of your refinish work.
What to Expect at Eastern Auto Paints
Eastern Auto Paints supplies trade professionals, collision centres, and serious restorers across Bayswater, Dandenong South, Melbourne, Victoria with premium automotive paint supplies.
When you source your repair materials through us, you receive:
- Advanced computerised colour-matching technology for precise OEM finishes.
- Industry-tested body fillers, putties, abrasives, and high-build priming systems.
- Honest, practical advice grounded in trade refinishing experience.
- Reliable dispatch and prompt order fulfilment across Australia.
We focus on delivering high-performance products that satisfy rigorous commercial body shop standards.
When to Get in Touch or Take Action
If you are preparing for an upcoming body restoration or troubleshooting persistent finish issues like sinkage or pinholes, getting expert advice early saves valuable workshop hours.
Explore our extensive surface repair collection online, or speak directly with our trade team before beginning complex panel work. Visit our store locations across Melbourne or reach out through our online Contact Us page for technical assistance and ordering support.
Practical Solutions and Reassurance
Dealing with surface defects during body repair work can be frustrating, but every common issue has a straightforward technical remedy:
- Pinholes after block sanding: Apply an ultra-thin skim of knifing putty tightly over the area using a flexible squeegee, then re-block dry.
- Visible edge rings around repairs: Extend your feathering margin using finer grit sandpaper and apply a dedicated 2K primer surfacer coat to isolate the repair boundary.
- Tacky or slow-curing filler: Ensure proper ambient temperatures and verify hardener mixing ratios according to the manufacturer's TDS.
With structured surface prep, quality abrasives, and compatible refinish coatings, trade-quality, flat panel repairs are completely achievable.
Closing Statement
Mastering the application of automotive paint filler requires attention to surface cleanliness, precise hardener integration, controlled dry sanding, and proper primer isolation. Taking a systematic approach to panel repair ensures invisible transitions and long-lasting topcoat durability.
Eastern Auto Paints remains committed to supporting trade applicators and serious restorers across Australia with trade-credible advice, computerised colour matching, and high-performance repair products. Explore our complete range of body fillers, sanding sheets, and 2K primers today, or contact our technical team for expert advice on your next restoration project.
Frequently Asked Questions About Automotive Body Filler
What is the main difference between body filler and knifing putty?
Body filler is a polyester-based compound designed to fill deeper dent impressions and build panel contours. Knifing putty, or stopper glaze, is a fine-density, low-viscosity material engineered strictly for skim coats, minor surface scratches, and micro-pinhole sealing.
Why should initial layers of body filler be dry sanded rather than wet sanded?
Polyester body filler is porous and absorbs liquid easily. Wet sanding early coats traps water inside micro-pinholes and uncured resin, which later expands under heat and causes topcoat blistering or paint bubbling.
How long must automotive paint filler cure before spraying primer or paint?
Cure times vary depending on environmental conditions, ambient shop temperatures, and specific product formulations. Applicators should always refer to the product label or manufacturer technical data sheet (TDS) for exact curing times before sanding or overcoating.
Can automotive body filler be applied directly over existing paint finishes?
Filler can be applied over properly prepared, fully cured OEM finishes that have been thoroughly cleaned and mechanically keyed with coarse abrasives. However, soft 1K finishes, lacquer coats, or questionable paint layers must be stripped back to bare metal before filling.
How do you prevent pinholes from forming when mixing body filler?
Pinholes are minimised by folding and pressing the cream hardener into the polyester paste using smooth squeegee sweeps on a non-porous board, rather than rapidly whipping air into the mixture.