
Coarse Sanding Pads Auto and How to Use Them
Why Coarse Sanding Pads Are the Foundation of Any Automotive Refinish
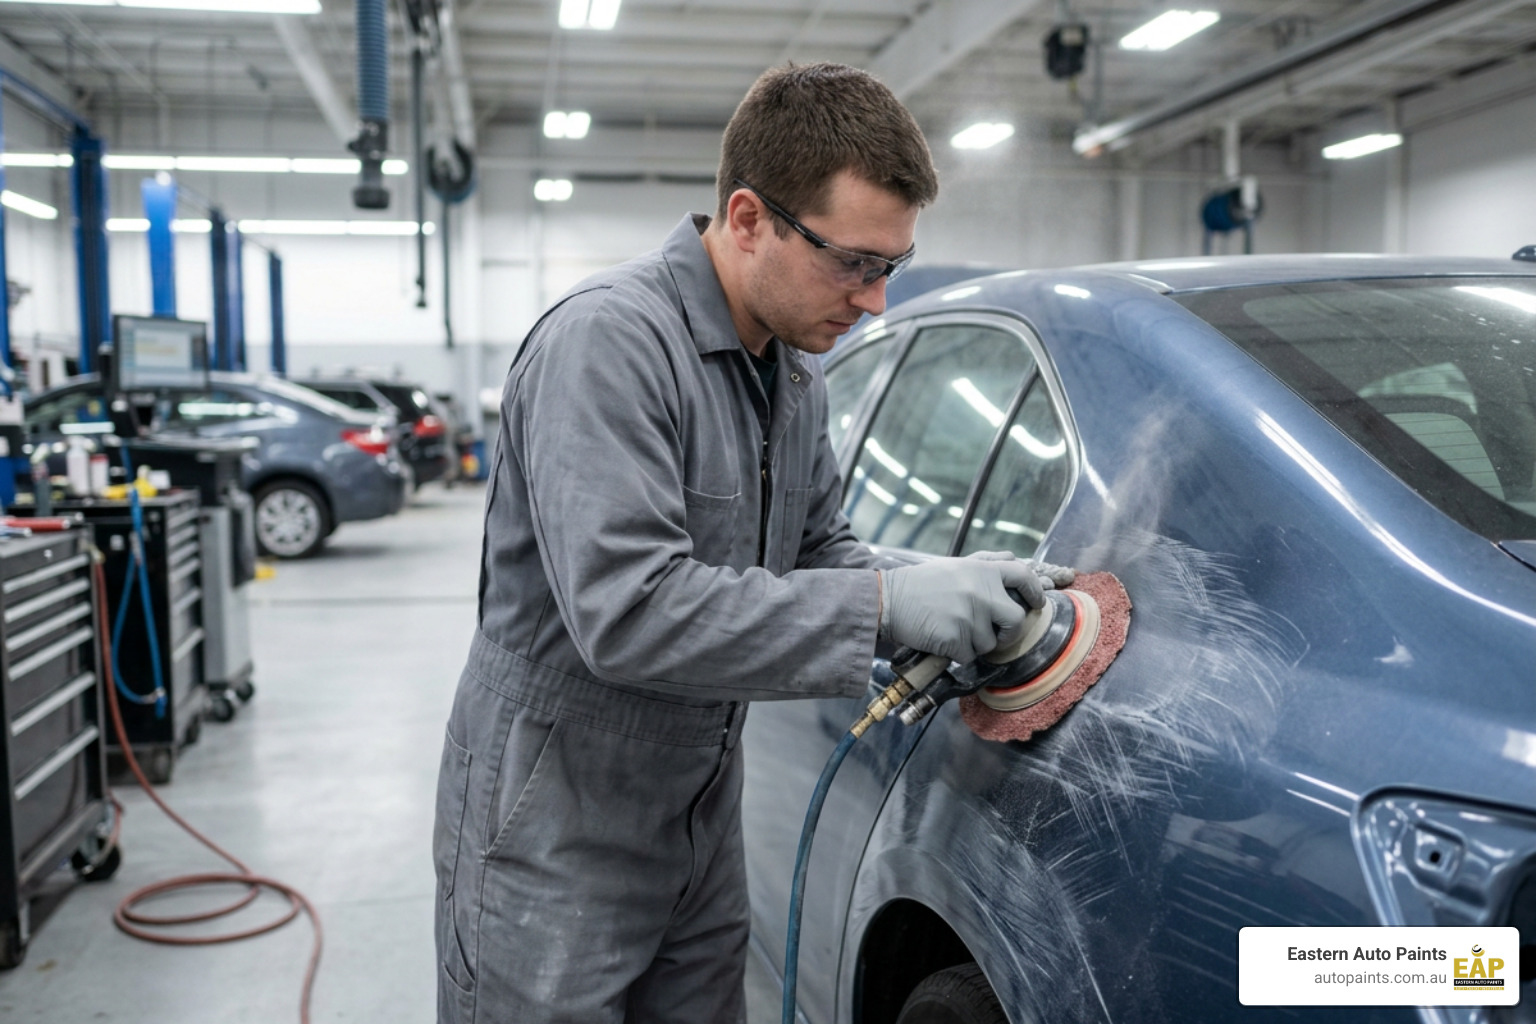
Choosing the right coarse sanding pads auto body technicians and DIY restorers rely on is the single most important decision you make before any paint ever touches a panel. Get it wrong and you're fighting deep scratches, poor primer adhesion, and a finish that won't last. Get it right and every stage after it becomes easier.
Here is a quick reference for selecting coarse automotive sanding pads:
| Grit Range | Classification | Primary Use |
|---|---|---|
| 80 | Coarse | Stripping old paint, shaping body filler, rust removal |
| 100 to 120 | Medium-Coarse | Levelling body filler, preparing metal and fiberglass |
| 180 to 240 | Medium | Feathering paint edges, preparing panels for primer |
- Use 80 grit to strip paint layers, remove rust down to bare metal, and shape cured body filler
- Use 100 to 120 grit specifically for levelling body filler and preparing metal and fibreglass surfaces
- Use 180 to 240 grit on roof, hood, and door panels where light corrosion or prior paint jobs are present to feather edges
- Progress from coarse to finer grits systematically to avoid leaving scratches that show through the final finish
- Match your abrasive material (ceramic, zirconia, or aluminium oxide) to the surface and task for best results
- Browse our range of sanding discs and sanding sheets at Eastern Auto Paints
Repainting a car is far more involved than simply applying a new coat over the old one. The quality of your surface preparation determines everything that follows, and coarse sanding is where that preparation begins. Whether you are stripping a rusted door panel, shaping fresh body filler, or feathering the edges of a repair zone, the coarse sanding stage sets the foundation that every subsequent coat of primer and paint depends on.
I'm James Maranis, owner of Eastern Auto Paints, and with more than 30 years in the coatings industry, I've seen how the right coarse sanding pads auto body repairs can make or break a finish. In the sections below, we'll walk you through everything you need to choose, use, and progress through coarse abrasives with confidence.
Why Proper Surface Preparation Should Not Be Ignored

Skipping or rushing the initial coarse sanding stage is one of the most common mistakes in automotive refinishing. When you are dealing with damaged panels, old paint, or surface corrosion, the foundation must be structurally sound. Without thorough preparation, any topcoat you apply will eventually fail.
The primary goal of using coarse abrasives is to establish a clean, stable substrate. This involves several critical steps:
- Rust Prevention: Corrosion is a progressive issue. If you paint over even minor surface rust, the moisture trapped underneath will continue to oxidise the metal. Using effective rust prevention and treatment products alongside coarse sanding pads helps grind away the rust entirely, exposing clean, bright steel that can be properly sealed.
- Paint Adhesion: Modern automotive paints require a mechanical "key" to stick to the surface. Smooth, glossy paint or bare metal does not offer enough surface texture for primers to grip. Coarse sanding scratches the surface, creating microscopic valleys that the primer can lock into.
- Body Filler Mapping: When repairing dents, understanding What is Body Filler for Cars and how to apply it is only half the battle. You must also prepare the surrounding metal. Coarse sanding helps feather the edges of the repair area so that the filler transitions seamlessly into the metal without creating visible mapping lines under the final paint.
Whether you are Filling Holes in Car Body panels or smoothing out a welded patch, starting with the correct coarse grit ensures your repair stays hidden and holds fast for years to come.
Common Challenges in Automotive Sanding
Working with coarse abrasives brings unique challenges that can affect both your efficiency and the quality of your repair. Understanding these challenges helps you avoid costly rework.
- Swarf Loading: As you sand paint, primer, or body filler, the removed material turns into a fine dust known as swarf. This dust can quickly accumulate between the abrasive grains on your sanding pad, clogging the disc and reducing its cutting efficiency. This is called "loading". Once a pad is loaded, it stops cutting and starts sliding, generating excess heat instead of removing material.
- Heat Buildup: High-pressure friction creates heat. When sanding metal, fibreglass, or plastic, excessive heat can warp the panel or soften the body filler, making it gummy and difficult to shape.
- Deep Surface Scratches: Coarse pads cut deep. If you apply too much pressure or use an incorrect technique, you can leave deep gouges in the metal or filler that are incredibly difficult to sand out with finer grits. These scratches can "sink" later, showing up as unsightly lines under your clear coat.
- Backing Pad Density: The density of the backing pad on your dual-action (DA) sander or sanding block plays a massive role. A hard backing pad is excellent for flat surfaces and levelling body filler, but it can easily cut through paint on curved edges. A soft or interface pad is better for contours but won't level flat areas effectively.
When you are preparing a panel, managing these factors is essential to get the job done right. For a deeper dive into avoiding common pitfalls, check out Don't Get Bogged Down: Your Complete Guide to Body Filler Sanding.
Understanding Grit Ranges for Coarse Sanding Pads Auto
In the automotive refinishing world, "coarse" refers to abrasives designed for heavy stock removal rather than finishing. Choosing the right grit within this range depends entirely on the material you are working with and the task at hand.
- 80 Grit (Coarse): This is the standard starting grit for heavy stock removal, stripping paint down to bare metal, and removing rust. It is also the ideal grit for shaping body fillers, providing the aggressive cut needed to level tough materials quickly.
- 100 to 120 Grit (Medium-Coarse): A highly versatile grit in any panel shop. It is perfect for the initial blocking and shaping of standard lightweight body fillers, as well as sanding panels with multiple prior paint jobs or light surface corrosion.
- 180 to 240 Grit (Medium): Often used to refine the deep scratches left by 80 or 120 grit pads before moving to finer prep papers. It is excellent for feathering paint edges and preparing fibreglass panels without generating excessive heat.
To understand how these grits fit into the broader repair process, read our guide on What Grit Sandpaper for Body Filler.
How to Use Coarse Sanding Pads Auto on Different Surfaces
Different materials react differently to aggressive sanding. Adjusting your technique based on the substrate is key to achieving a professional result.
- Bare Metal: When stripping steel panels, keep your sander flat. Angling the sander can create deep gouges in the metal that will require extra filler to smooth out. Move the sander in steady, overlapping passes, letting the weight of the tool do the work rather than pushing down hard.
- Fibreglass and Plastics: Fibreglass is highly sensitive to heat. Sanding too aggressively in one spot can melt the resin or warp the panel. Use a lighter touch and keep the sander moving constantly.
- Cured Body Filler: When shaping filler, hand-sanding with a dedicated block is highly recommended over machine sanding. A block keeps the surface flat, preventing you from creating hollows or low spots. Sand in a cross-hatch (X) pattern to ensure a perfectly level surface.
For step-by-step guidance on mastering this stage, check out How to Bodyfiller Like a Pro.
Selecting the Right Coarse Sanding Pads Auto
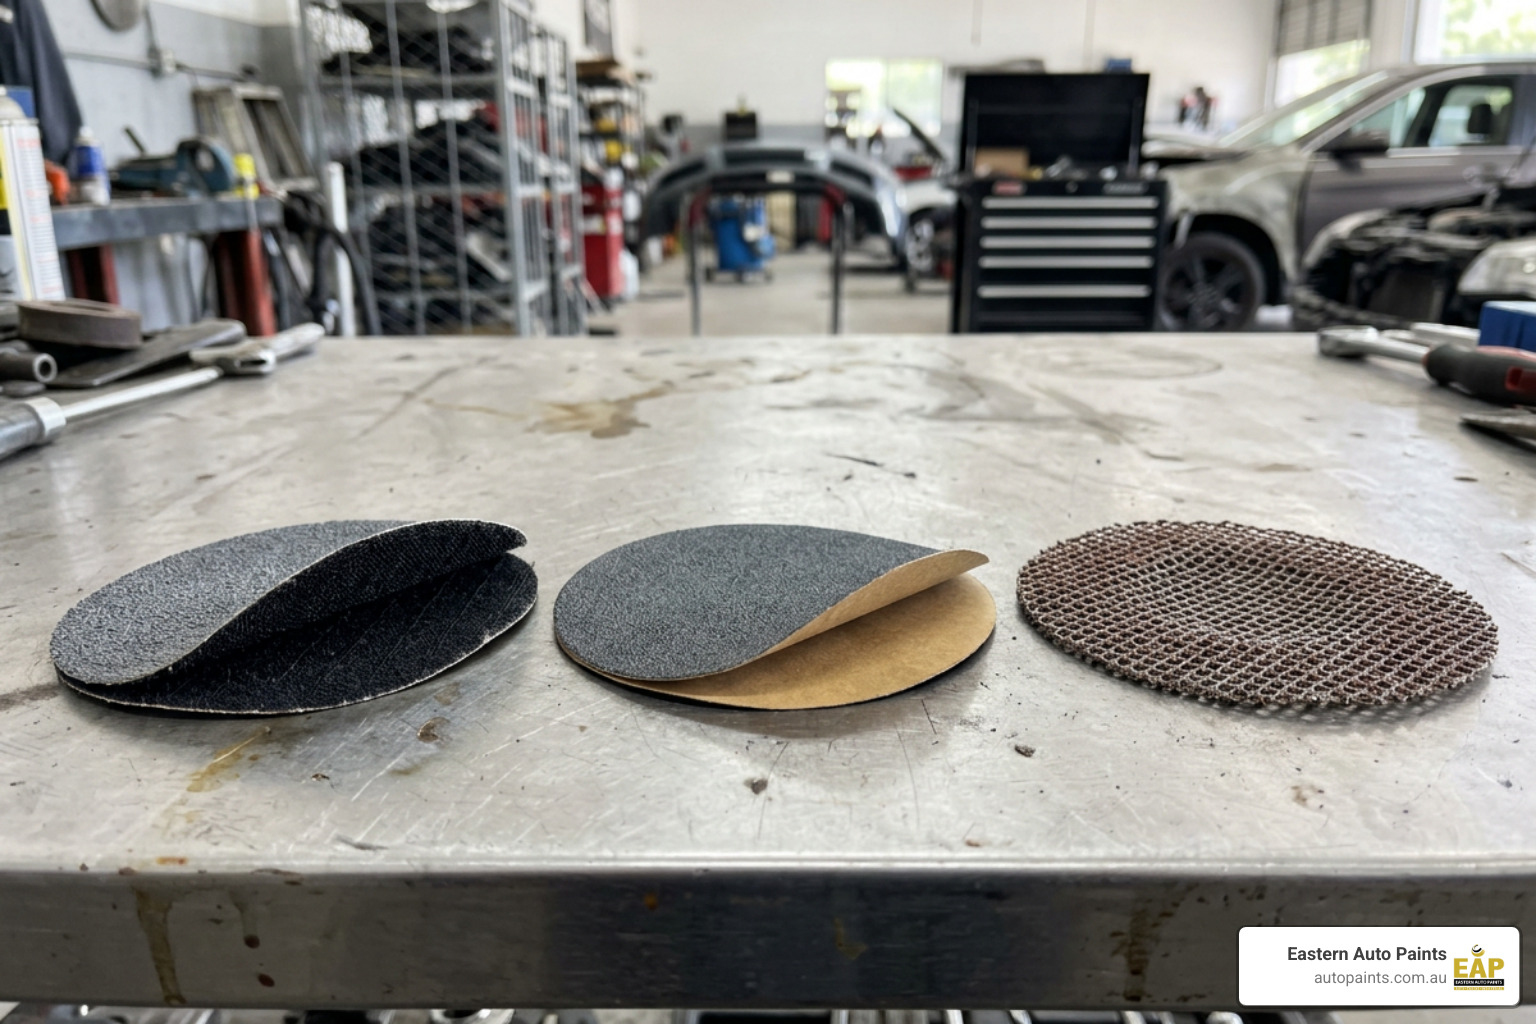
With so many options on the market, finding the right coarse sanding pads auto projects require involves matching the abrasive mineral and the backing design to your specific application. Using the wrong pad can lead to premature wear, uneven finishes, or excessive dust in your workshop.
Comparing Abrasive Materials: Ceramic vs Zirconia vs Aluminium Oxide
The mineral grains bonded to your sanding pad determine how fast it cuts and how long it lasts.
Ceramic Abrasives
Ceramic is a highly durable, modern abrasive material. The grains are engineered to self-fracture under pressure, constantly exposing fresh, sharp cutting edges as you work.
- Best Suited For: Heavy-duty paint stripping, grinding down welds, and shaping extremely hard body fillers.
- Key Merits: Exceptional longevity, cool running temperatures, and a highly consistent cut-rate throughout the life of the pad.
Zirconia Abrasives
Zirconia alumina is a tough, high-performance mineral designed to withstand intense pressure and heat.
- Best Suited For: Aggressive rust removal, grinding raw steel, and heavy stock removal on metal panels.
- Key Merits: Excellent heat resistance and high durability under heavy mechanical loads.
Aluminium Oxide Abrasives
Aluminium oxide is the traditional, highly versatile workhorse of the automotive refinishing industry.
- Best Suited For: General paint preparation, feathering edges, and shaping standard body fillers.
- Key Merits: Highly versatile, cost-effective, and available in a wide range of formats and grits.
Which One Do You Need?
If you are tackling a large-scale project involving heavy paint stripping or rust removal on tough steel, Ceramic or Zirconia pads offer the durability and speed required to get through the job efficiently. For general panel preparation, everyday blocking of body filler, and feathering paint lines, Aluminium Oxide sanding sheets and discs remain a practical and reliable choice.
Backing Types: Hook and Loop vs PSA vs Mesh
How the sanding pad attaches to your tool or block, affects both user convenience and the quality of the cut.
Hook and Loop Backing
This system uses a simple Velcro-style attachment, allowing you to peel pads off and stick them back on in seconds.
- Key Merits: Extremely fast pad changes and the ability to reuse partially worn discs later.
- Best Suited For: Multi-stage sanding where you frequently transition between different grits.
Pressure Sensitive Adhesive (PSA) Backing
PSA discs feature a sticky, self-adhesive backing that bonds directly to a flat vinyl backing pad.
- Key Merits: Provides an exceptionally flat, low-profile sanding surface with no cushioning, reducing the risk of rounding off sharp body lines or creating surface waves.
- Best Suited For: Precision hand-blocking and flat-panel machine sanding.
Open-Mesh Backing
Mesh pads feature an open-net structure where the entire surface is covered in thousands of tiny holes, allowing dust to pass directly through.
- Key Merits: Virtually dust-free sanding when paired with a vacuum extraction system, excellent resistance to swarf loading, and cooler running temperatures.
- Best Suited For: Dry sanding body fillers, primers, and paint where dust control is a priority.
Which One Do You Need?
For rapid grit transitions during general panel prep, Hook and Loop offers unmatched convenience. If you are focused on achieving laser-straight body lines on flat panels, a PSA disc on a rigid block is highly effective. If you want to keep your workshop clean and extend the life of your abrasives by preventing clogging, open-mesh technology is the modern professional standard.
What a Personalised Experience Actually Looks Like
At Eastern Auto Paints, we don't believe in one-size-fits-all solutions. A commercial workshop stripping commercial transport vehicles needs a completely different abrasive setup than a restorer working on a classic car in their home garage.
Our team takes the time to understand your specific project. We look at the substrate you are working on, the coatings you plan to apply, and the equipment you have on hand. For example, if you are preparing a panel for a high-build primer, we can recommend the exact coarse grit progression to ensure proper adhesion without leaving deep scratches that might show through your final topcoat.
Understanding how your prep work interacts with your primers is crucial. To learn more about selecting the right foundation, read A Practical Guide to Choosing Auto Paint Primers and Choosing Your Canvas: Understanding Automotive Paint Primer Types.
The Value of Consistency and an Ongoing Relationship
For trade professionals in Melbourne's south-east, consistency is everything. A minor variation in abrasive quality or paint colour can lead to costly delays and rework.
By partnering with Eastern Auto Paints, you gain access to a reliable supply chain of premium, authentic brands like PPG, Concept, and Jotun. We maintain a detailed record of your past orders and custom formulations. Our precision colour matching services rely on advanced technology used alongside experienced professionals, backed by thousands of saved formulations, ensuring that when you return for a topcoat or touch-up batch, the colour matches perfectly every single time.
What to Expect at Eastern Auto Paints
Whether you visit our Bayswater head office or our Dandenong South trade showroom and warehouse, you will find a team of industry professionals ready to assist. We stock a comprehensive range of professional-grade paints, coatings, abrasives, and workshop equipment.
As a PPG Select Distributor, a certified Jotun Australia distributor, and the master wholesale distributor for Concept Paints in South East Victoria, we stand behind the quality of every product on our shelves. To learn more about our history and our commitment to the Victorian automotive trade, visit our about EAP page.
Your Next Steps for a Professional Finish
Achieving a flawless paint job requires a systematic approach, starting with aggressive stock removal and progressing through to the final clear coat.
- Assess and Strip: Evaluate the panel and use coarse abrasives to remove rust, old paint, or damaged coatings down to a sound substrate.
- Repair and Shape: Apply premium body fillers to low spots, then use rigid sanding blocks to block the surface flat.
- Refine and Feather: Step down through medium grit abrasives to remove coarse scratches and feather the paint edges smoothly into the repair zone.
- Prime and Paint: Apply your chosen primer, block sand with fine paper, and apply your colour and clear coats.
Application and drying times vary from product to product, so always check the manufacturer's technical data sheet or product label for the exact specifications before you start.
For expert advice on choosing the right abrasives, primers, and custom-matched paints for your next project, get in touch for advice with Eastern Auto Paints today.
Frequently Asked Questions About Coarse Sanding
How do I choose between 1K and 2K primers after coarse sanding?
Choosing the right primer depends on the scale of your repair and the level of durability you require. Single-pack (1K) primers are convenient, dry quickly, and are well suited for minor touch-ups or quick repairs. Two-pack (2K) primers use a chemical hardener to cure, offering superior build, excellent rust resistance, and a highly durable foundation for professional refinishing. Application and drying times vary from product to product, so always check the manufacturer's technical data sheet or product label for the exact specifications before you start. You can browse our range of 1K primer and 2K primer products online.
What is the best way to prevent coarse sanding pads from clogging?
Swarf loading is a major challenge during coarse sanding. To minimise clogging, use open-mesh sanding discs which allow dust to be drawn directly through the pad. If you are dry sanding, pairing your sander with a dedicated vacuum extraction system will remove dust before it can pack between the abrasive grains. For traditional paper-backed discs, using a rubber sanding stick to clean the pad periodically can help clear out trapped dust.
How do I transition from coarse sanding to priming?
Transitioning from coarse sanding to priming requires a careful grit progression to prevent deep scratches from showing through your final finish. As a general rule, never skip more than one grit stage at a time (for example, progress from 80 grit to 120 grit, then to 180 grit). Once you have feathered the edges of your repair zone, apply a high-quality primer to seal the work. For heavy-duty rust protection on bare metal, starting with an epoxy primer is highly recommended.
What safety equipment should I use when coarse sanding?
Coarse sanding generates a significant amount of airborne dust, metal particles, and old paint debris. It is essential to wear appropriate personal protective equipment (PPE). This includes safety glasses to protect your eyes from flying debris and heavy-duty work gloves. Because different materials (such as body filler, fibreglass, and old lead-based paints) carry different respiratory risks, always consult the product's safety data sheet (SDS) and relevant SafeWork Victoria guidelines to select the correct respiratory protection. You can view our range of PPE masks to find a suitable option for your workshop setup.
Can I use coarse sanding pads wet or dry?
Coarse sanding pads in the 80 to 120 grit range are designed almost exclusively for dry sanding. Wet sanding with ultra-coarse grits can cause bare steel panels to rust rapidly and can make body fillers swell by absorbing water. Wet sanding techniques are generally reserved for fine-grit finishing papers used on primer or clear coats. Always check the manufacturer's specifications for your specific abrasive; if you require wet-use sheets for finer stages, we stock a variety of wet and dry sheets to suit your needs.